

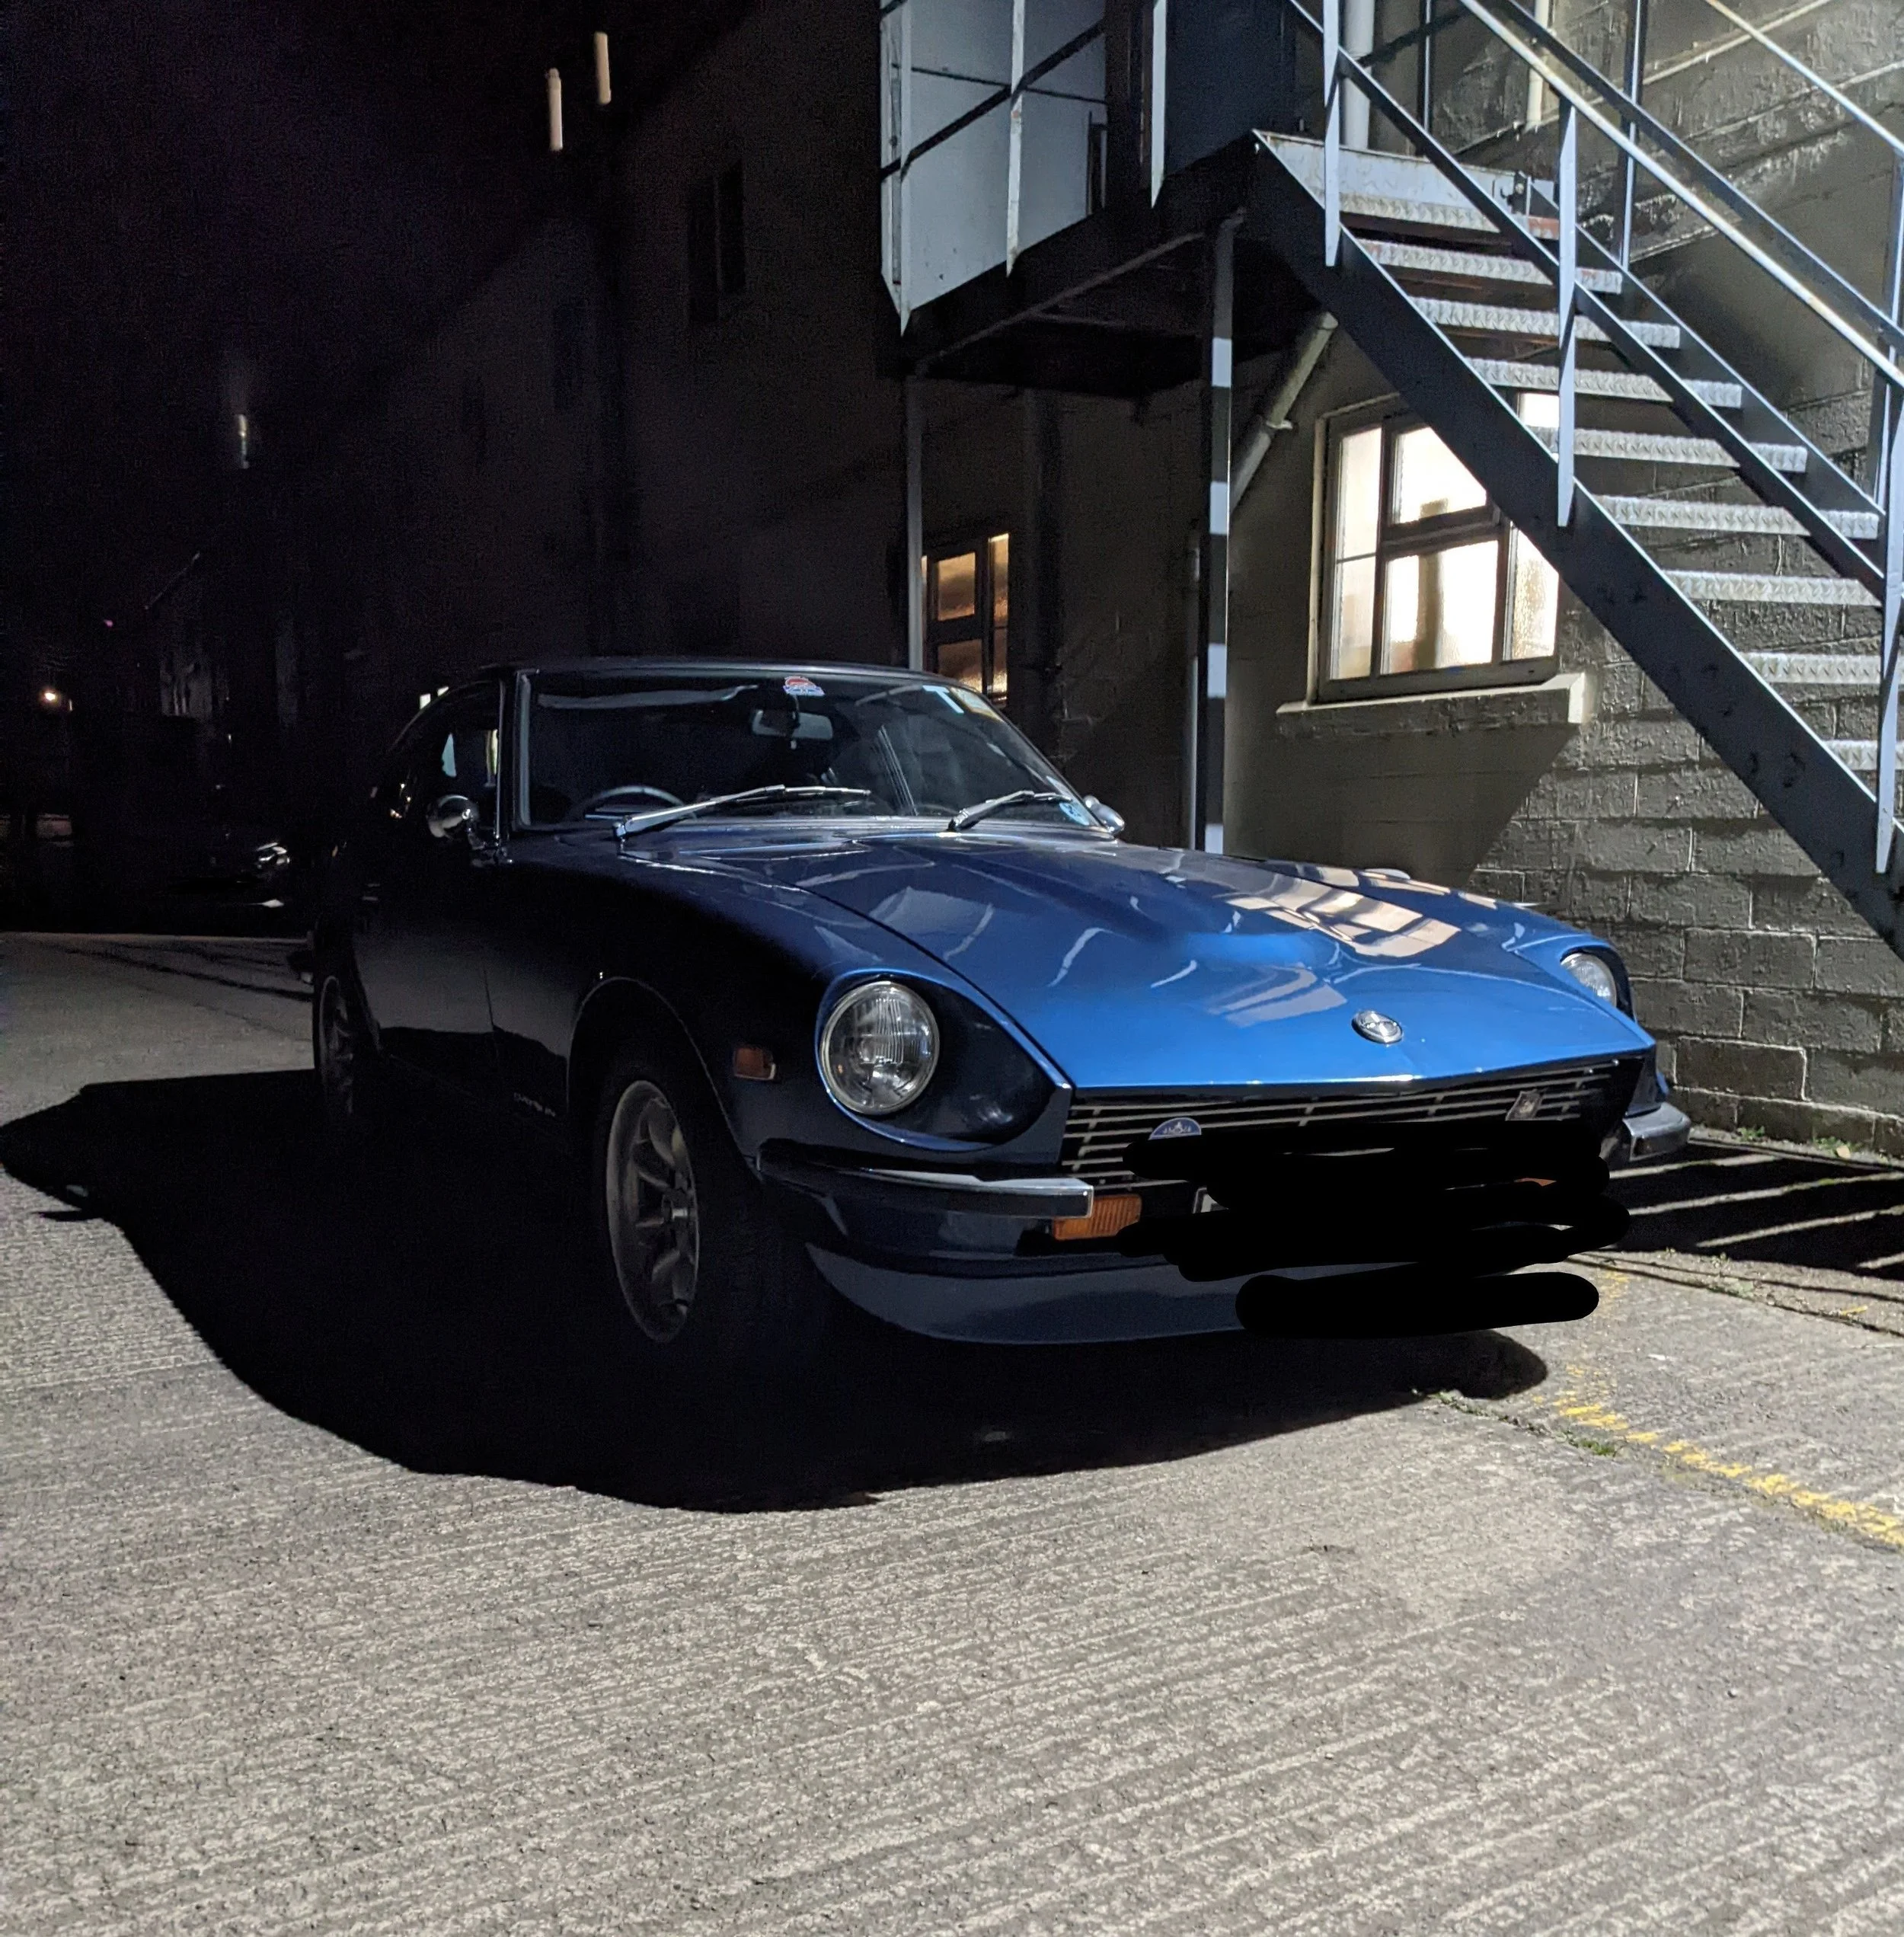
1973 Datsun 240z.
My dream car, and my financial demise; but a golden opportunity to showcase my expertise in precise plastics design and manufacturing.
As this car is 50 years old, all the original factory plastic components are brittle, cracked, or just missing completely.
And even better, I can’t just order these parts on next-day Halfords pick-up in-store. If I ask anyone about ‘Datsun’ parts, they just think I’m interested in their family tree.
This is a monumental task to restore a classic car, especially as someone with zero mechanical background, but this is a childhood dream car of mine, and I had an opportunity one day, and I couldn’t turn it down.
Tackling one job at a time, I’m hoping to have this car restored to an OEM-plus specification. Blending timeless design and character with modern amenities without being destructive or intrusive with my modifications.
This is where 3D printing shines.
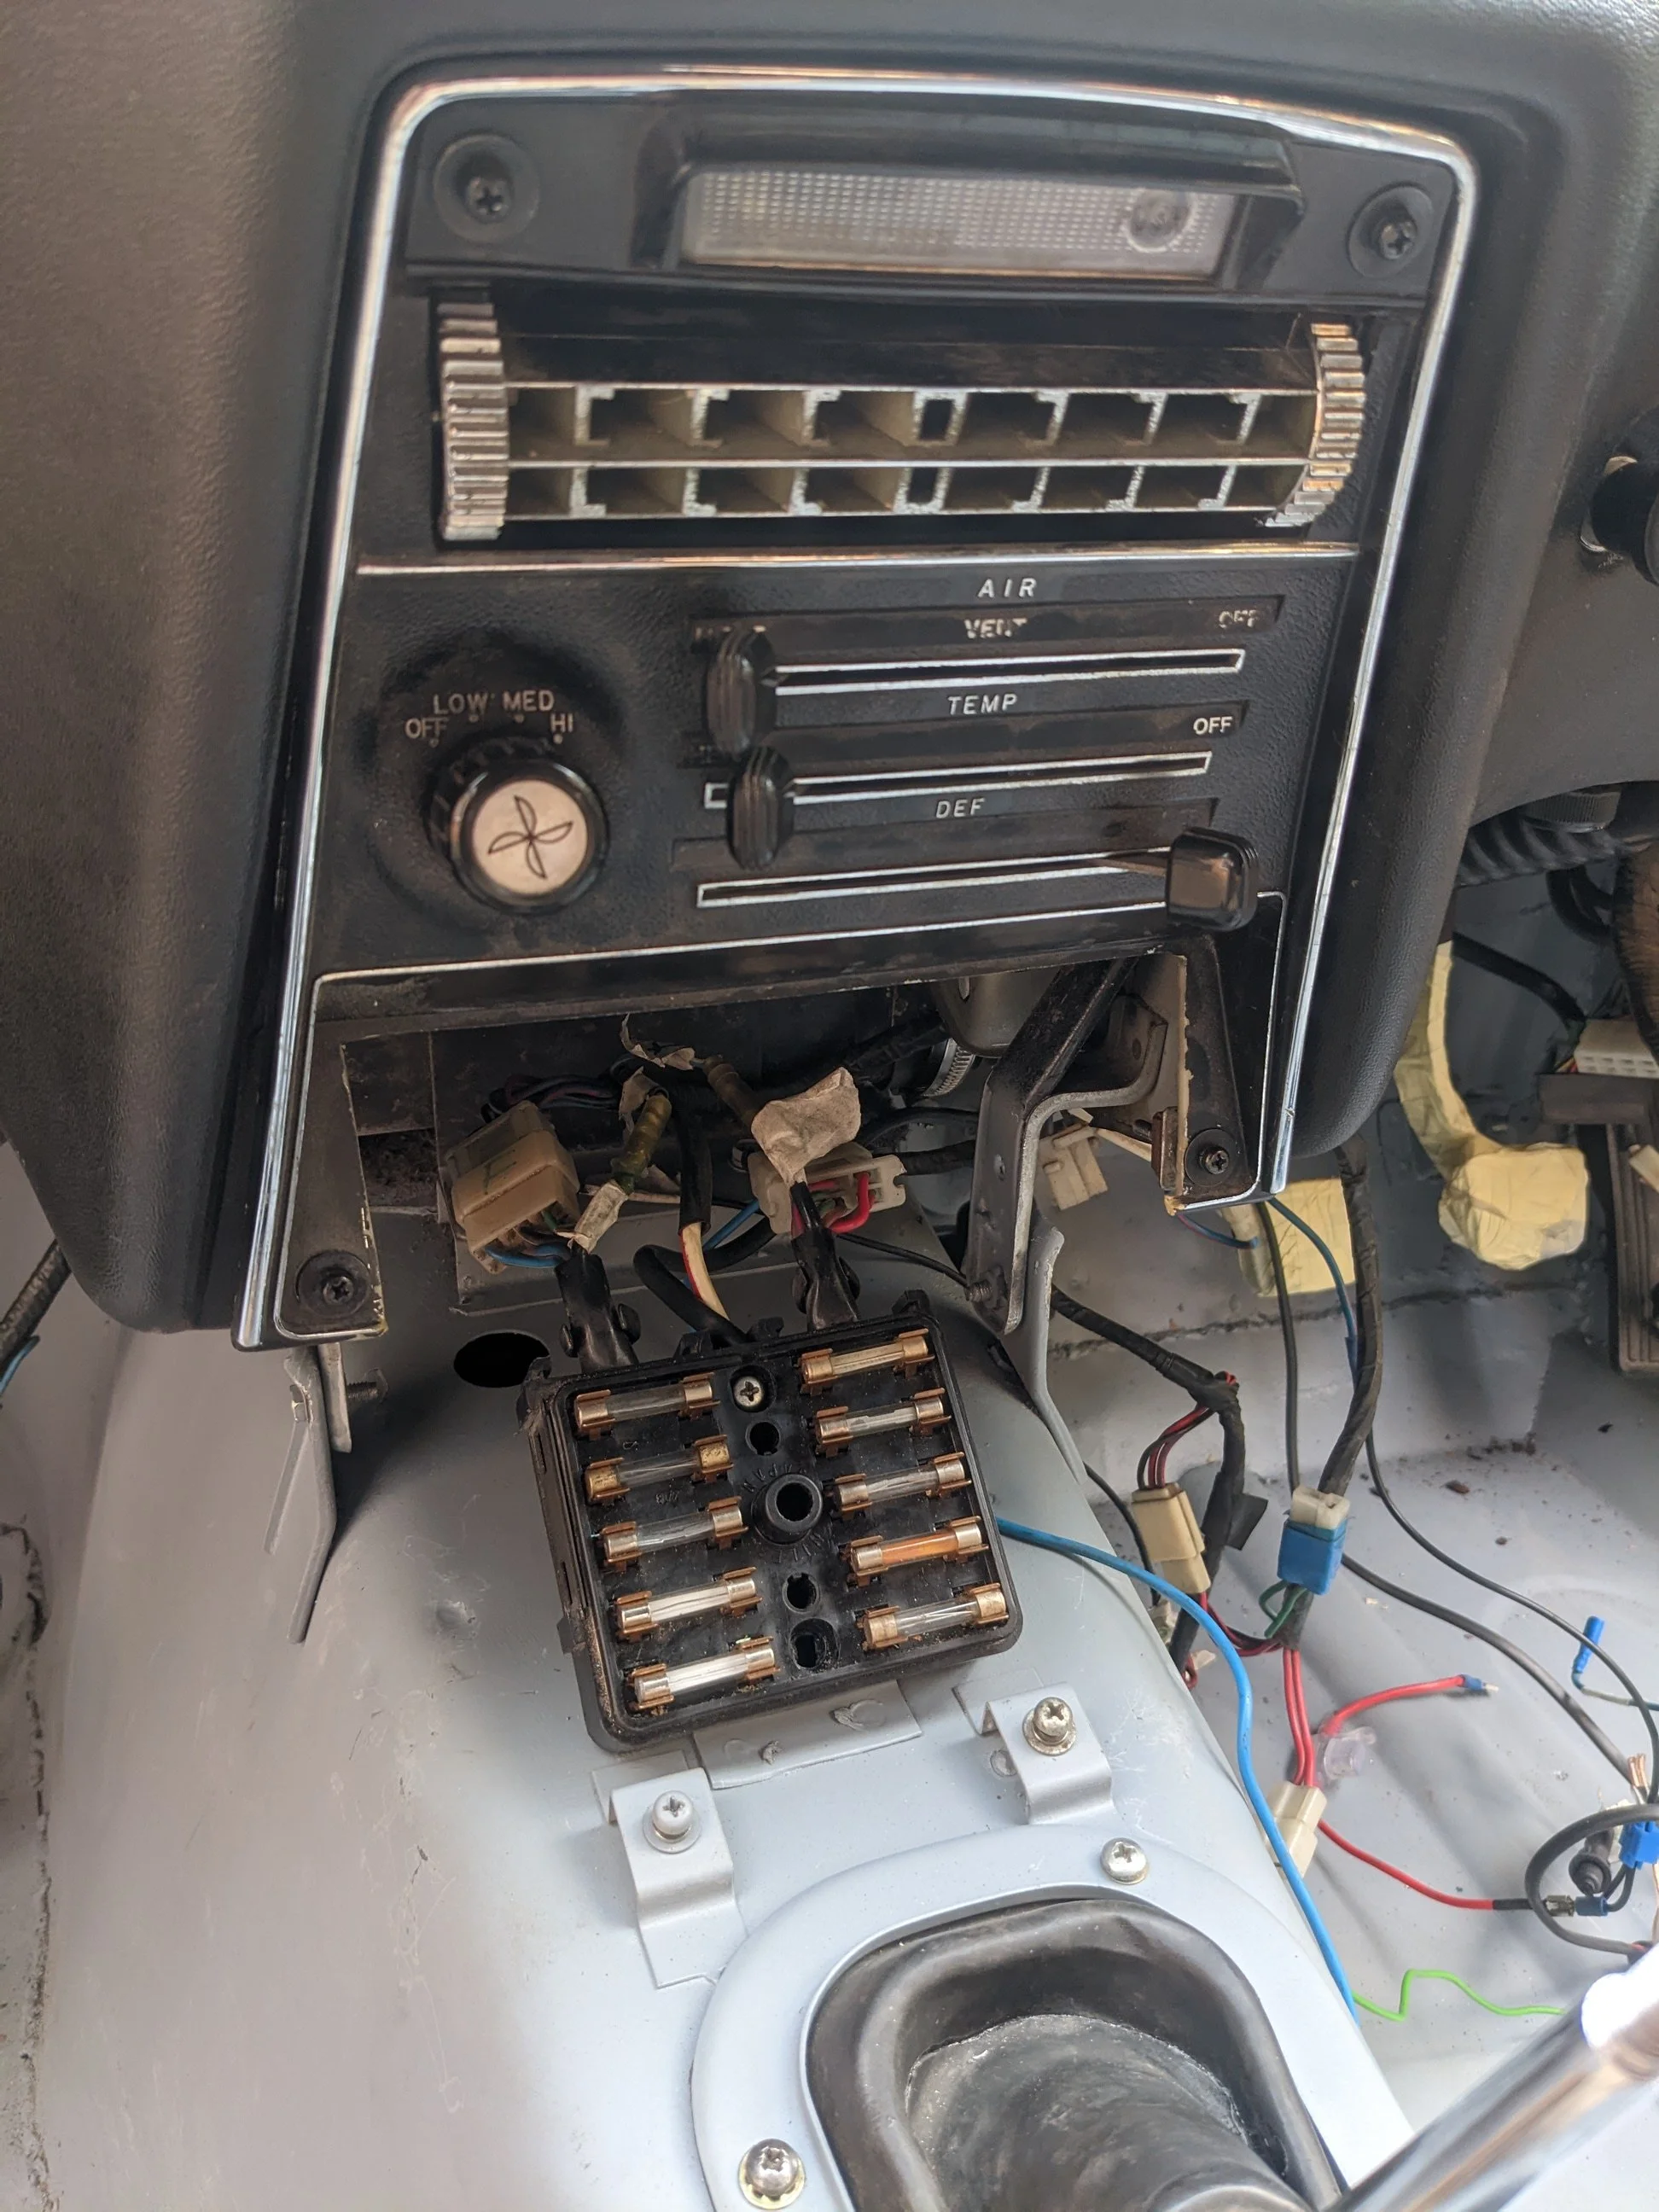
The first job on the list during my teardown of the car's interior was this heating control panel.
The previous owner of this car had turned it into a track car to race at Castle Combe, so there were some previous modifications made to certain panels on the inside of the car, much like this part.
This liftable panel was originally meant for heating controls and ‘extras’ for high-spec’d cars back in the 70s. However, the previous owner had cut the original panel to fit switches for an electric radiator fan and a cut-off switch for the fuel pump. While their modifications were functional, they had made a right mess of the visual execution.
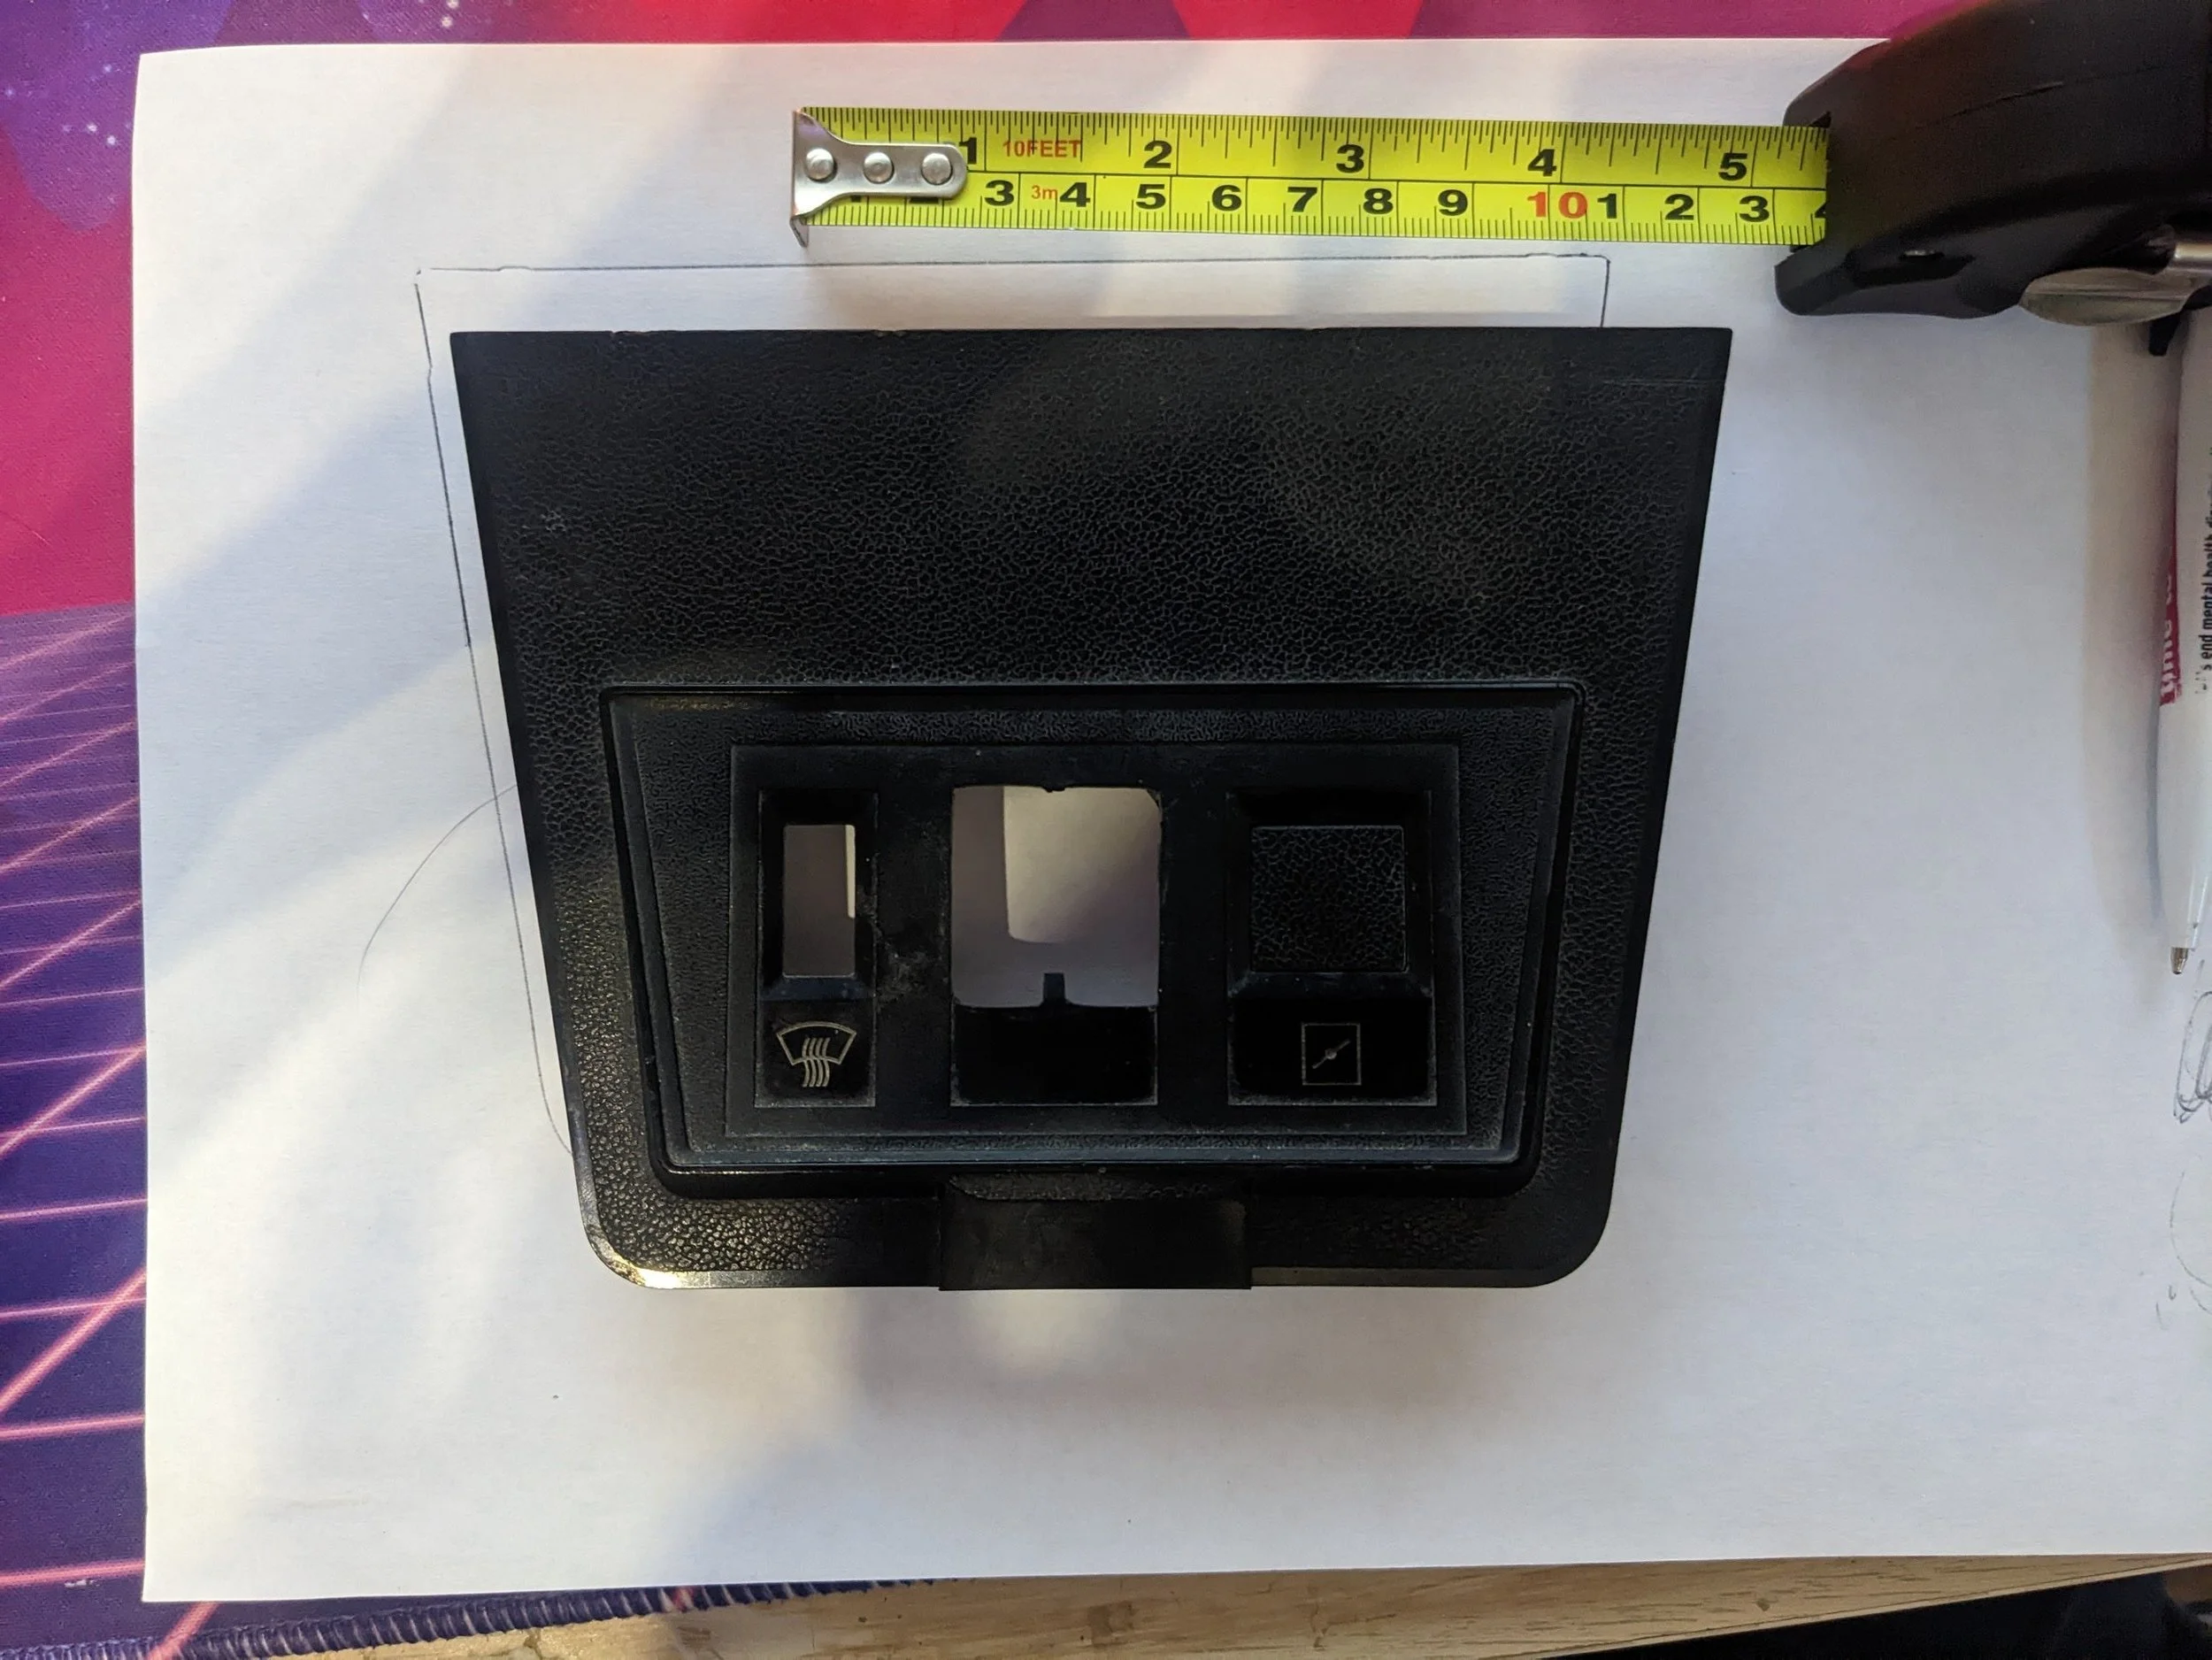
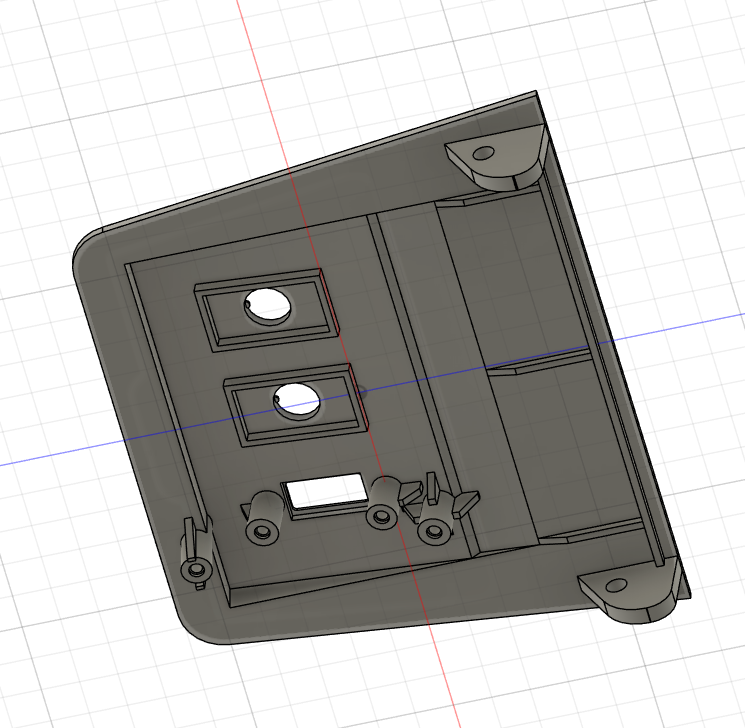
The original panel is also on a pin hinge, as it covers the fuse box for the car. So, I first had to ensure my model would fit the pin built into the centre console (one of which was snapped off).
To combat this, I designed my panel to have a slot for the remaining pin, and on the other side, I added a pin that would slot into the console. I then drilled out a small hole to allow the hinge to still function as it did 50 years ago.
After measuring everything 10 times over and creating card prototypes to hone in on the correct fit, it was time to start developing my own design for this part.
3D Design Prototypes
I began to model the switch panel in CAD software, ensuring all measurements were correct, and I was now ready to start printing prototypes of my design. I ultimately decided to maintain the switches for power cut-offs for both the fan and fuel pump, as I thought they were now part of this car's story.
I never set out to make a pristine example of a 240Z. I wanted to take this car and make it what I want, while still preserving the history and story it had before I got my hands on it. Consider my input in this car's history as the TLC fairy.
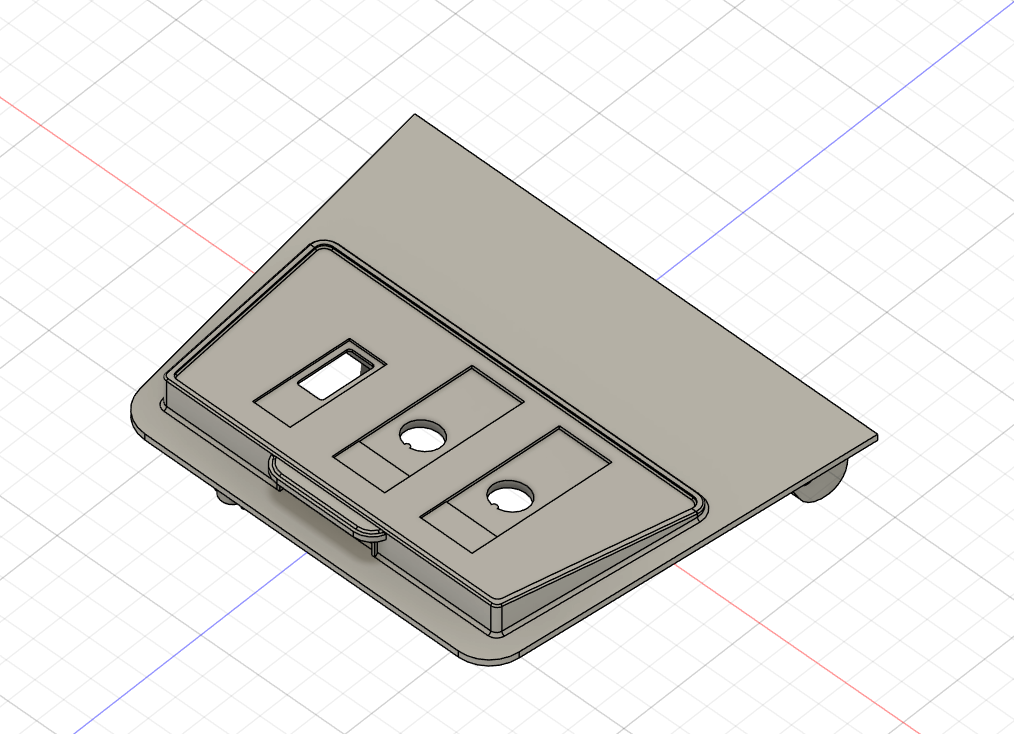
After a couple of iterations of this panel, I got the idea to add in some debossed graphics so I could label the switches, making it a bit more user-friendly. Pictured here is the first iteration of the idea coming to fruition.
Thankfully, I didn’t stick with this font or text for the final design, but it was a proof of concept for the next and final design.


Final Product
Yes, I put fighter jet-style switches in my 70s car, and yes, I’m a child, but I love them.
Finished in satin black paint, it suits the car perfectly, as well as fits flawlessly. The debossed logos are clear even without paint, so I decided to keep it all black for a more timeless, sleek look. (Ignore the scratch on the fan switch; it's fixed now.)
With the classic ‘Z’ logo at the top of the panel, I think it adds a boutique feel to the interior of the car and serves as a great reminder of the heritage of the car while not being gaudy like most supercars of the modern era, with their illuminated and neon-colored logos plastered all over.
Three years later, this part is still functional with no repairs needed.

Good Vibrations.
Adding Speakers to the Datsun.
When I first got the car, it had only one speaker… located in the boot area of the car…
And I know that some people will be saying, “Eh, you don’t need no music when you’re driving a car with triple carbs and a lovely exhaust!”
But this is my car, and I don’t care. I like my journeys with a soundtrack to remember them by. So I knew I had to find ways to add more speakers to the car, especially in places where I could actually hear them.
Most people who have the same thought process as me do the unspeakable and CUT HOLES in their door cards. I wasn’t going to do that. Not only because it’s foolish, as you can’t get original replacements easily, but also because you would then need to route cables from the cabin into the doors, and I can imagine that you’d need to cut holes in the doors and add grommets, etc. etc.
So instead, I found this panel, rather charmingly made from MDF or something similar, down in the footwells. And again, assuming these are original parts, I want all my modifications to be non-intrusive and totally reversible. So, rather than cut a hole in these and add speaker grills (which wouldn’t have worked anyway due to clearances), I decided to create a full panel that had mounting for a speaker that would replace this panel.
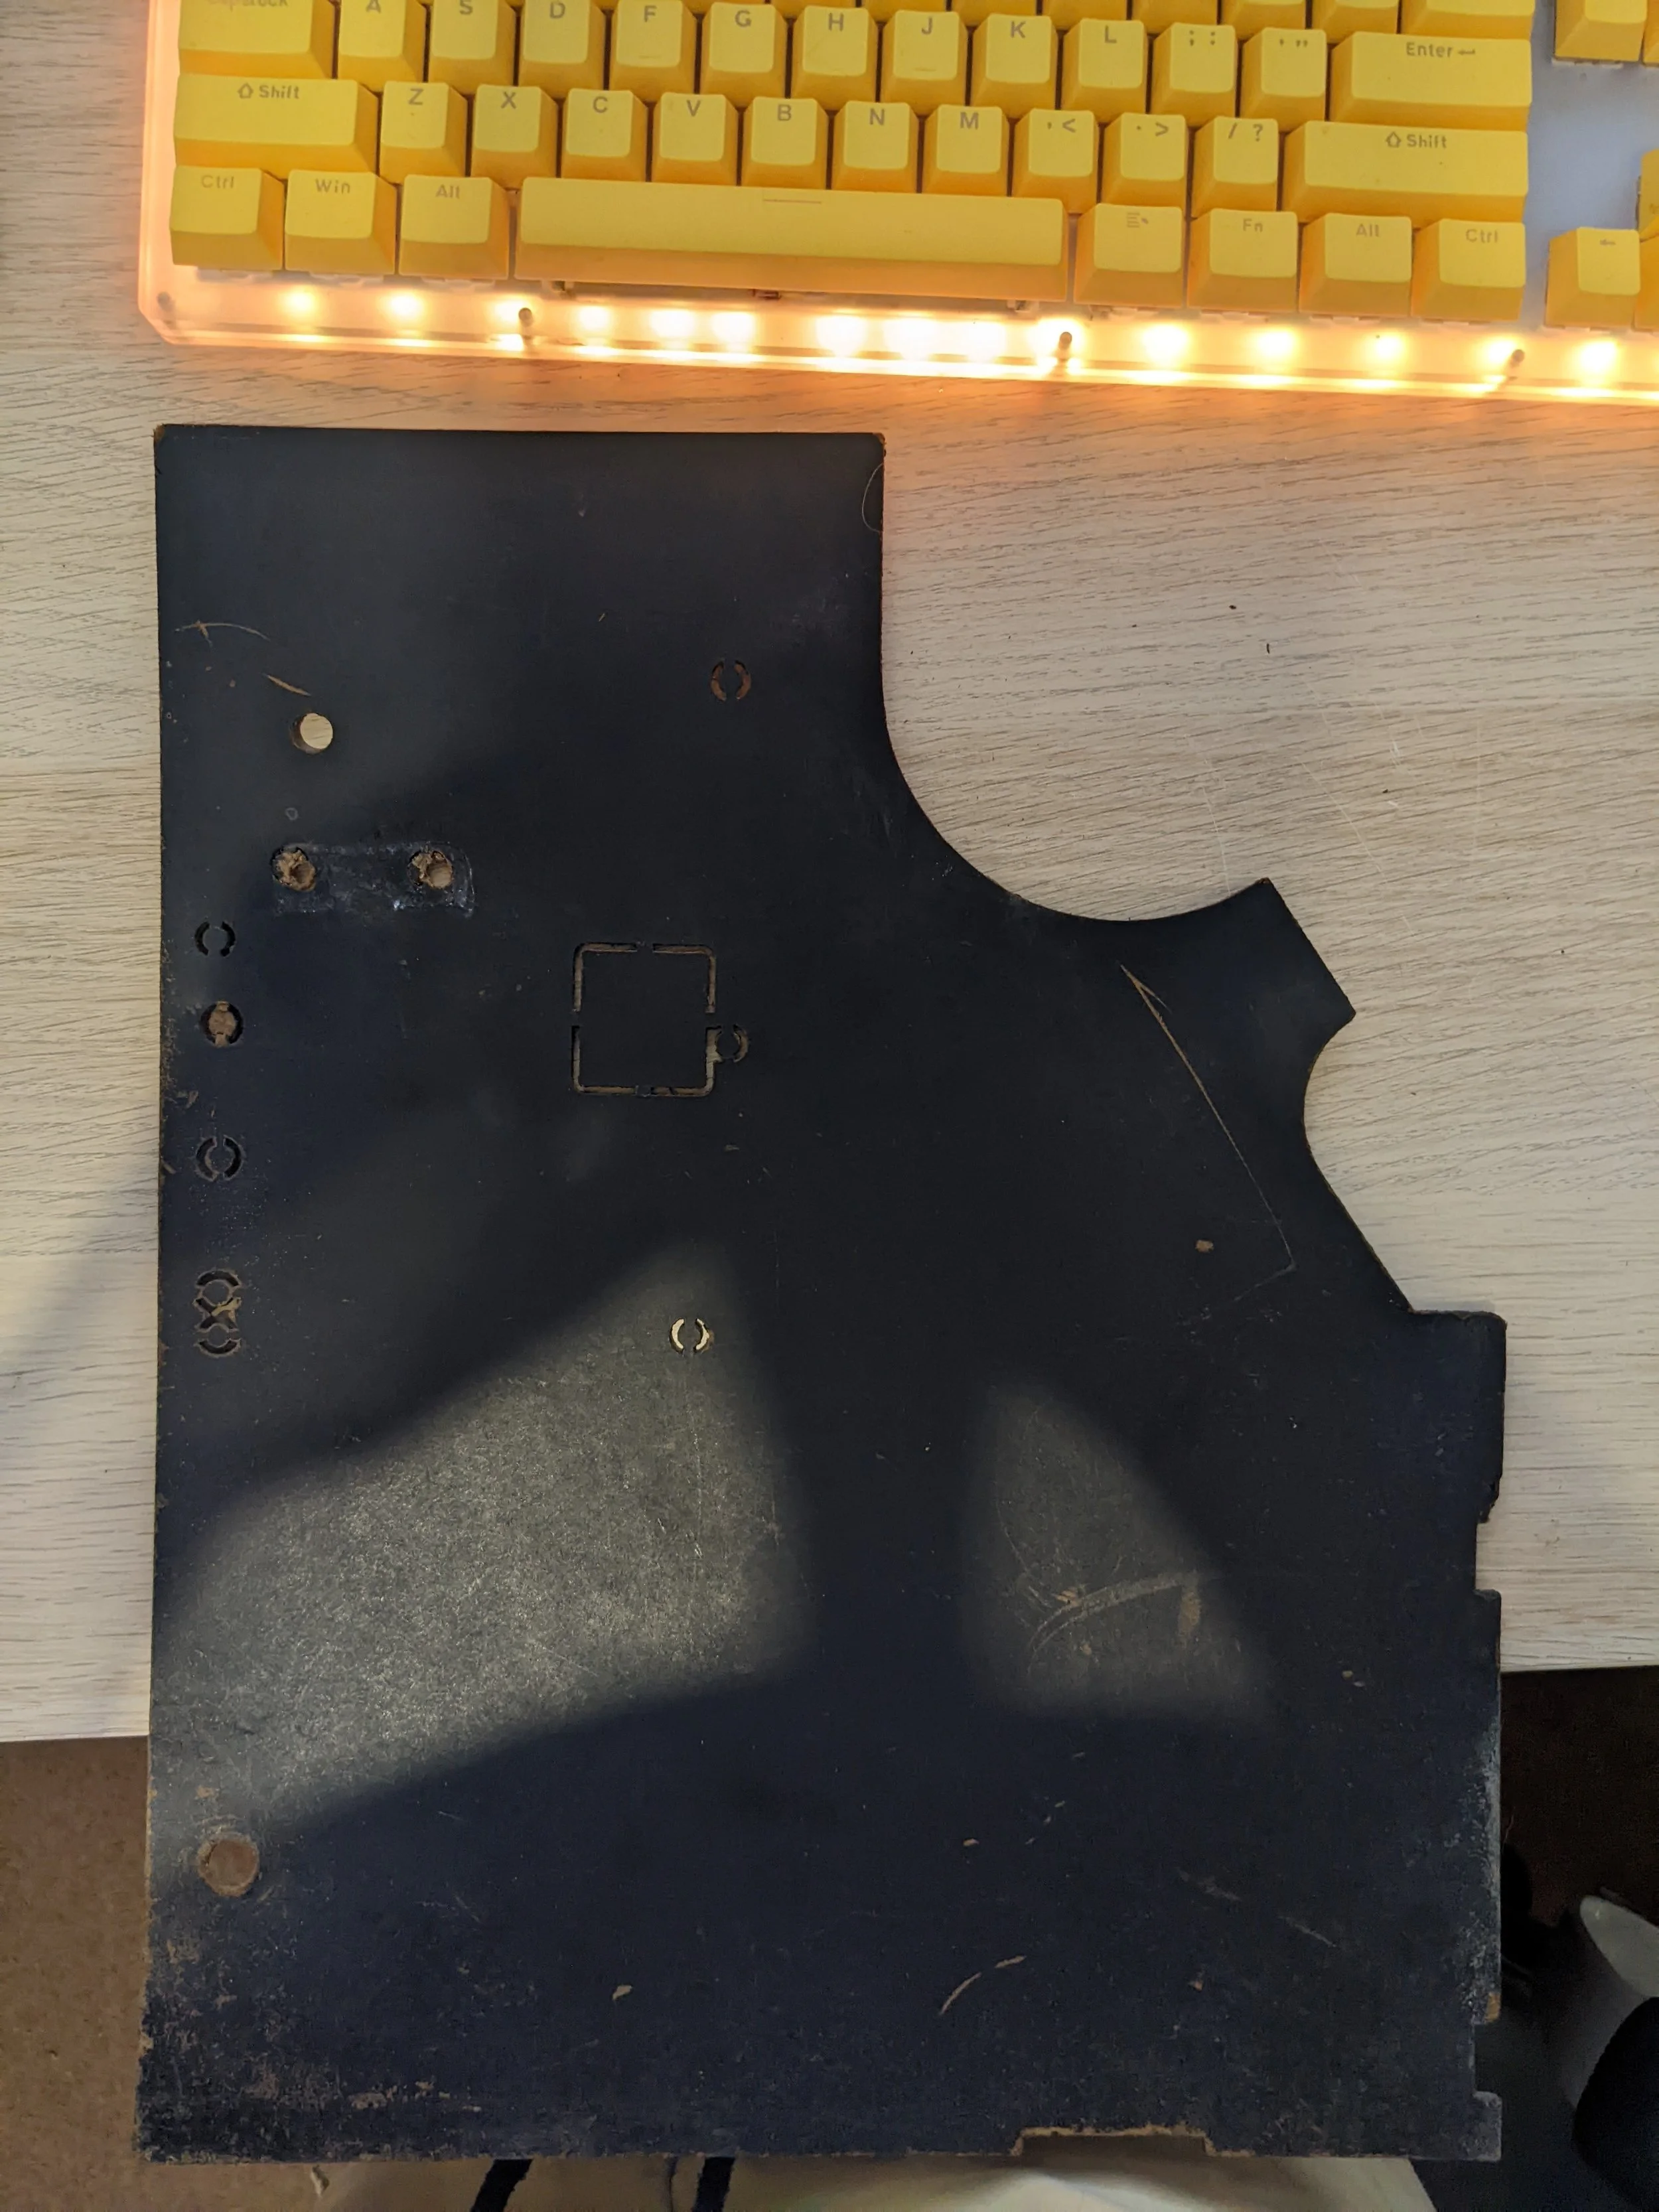
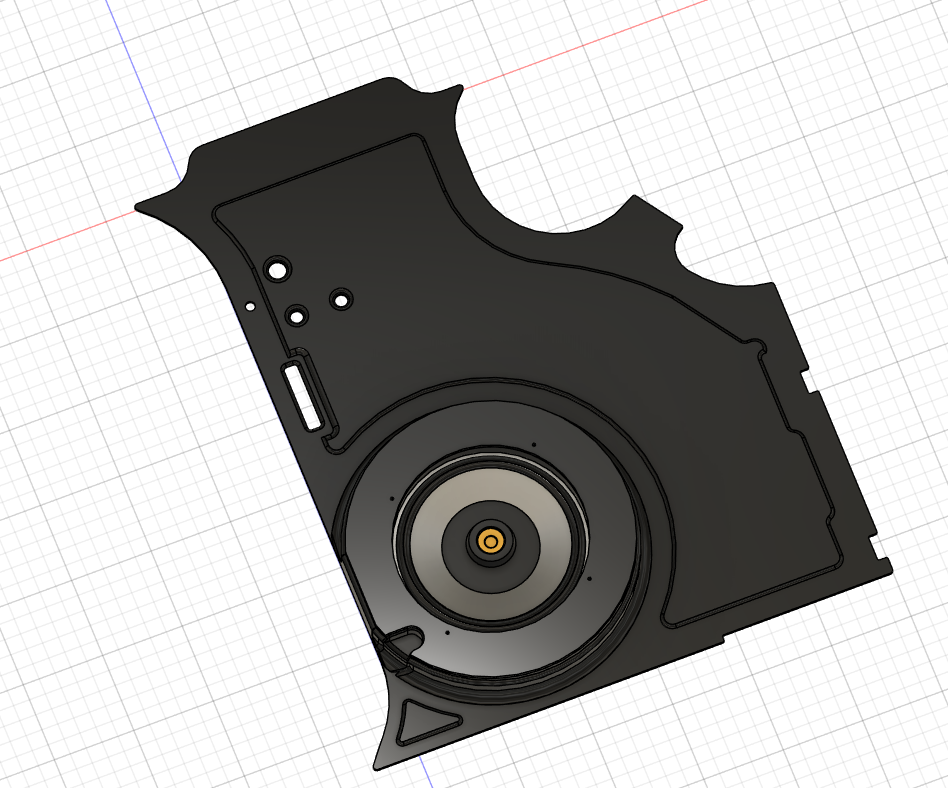
After tracing the profile of this panel onto some graph paper, I was able to draw this panel up in CAD and start fitting my speakers of choice.
Double-checking that all the holes for original hardware were in the correct places, and adding an upward angle to the speaker mounting ‘hump’ to make sure the sound was actually coming towards the occupants of the car and not into their feet.
I began printing prototypes for fitment.
3D Printed Prototypes
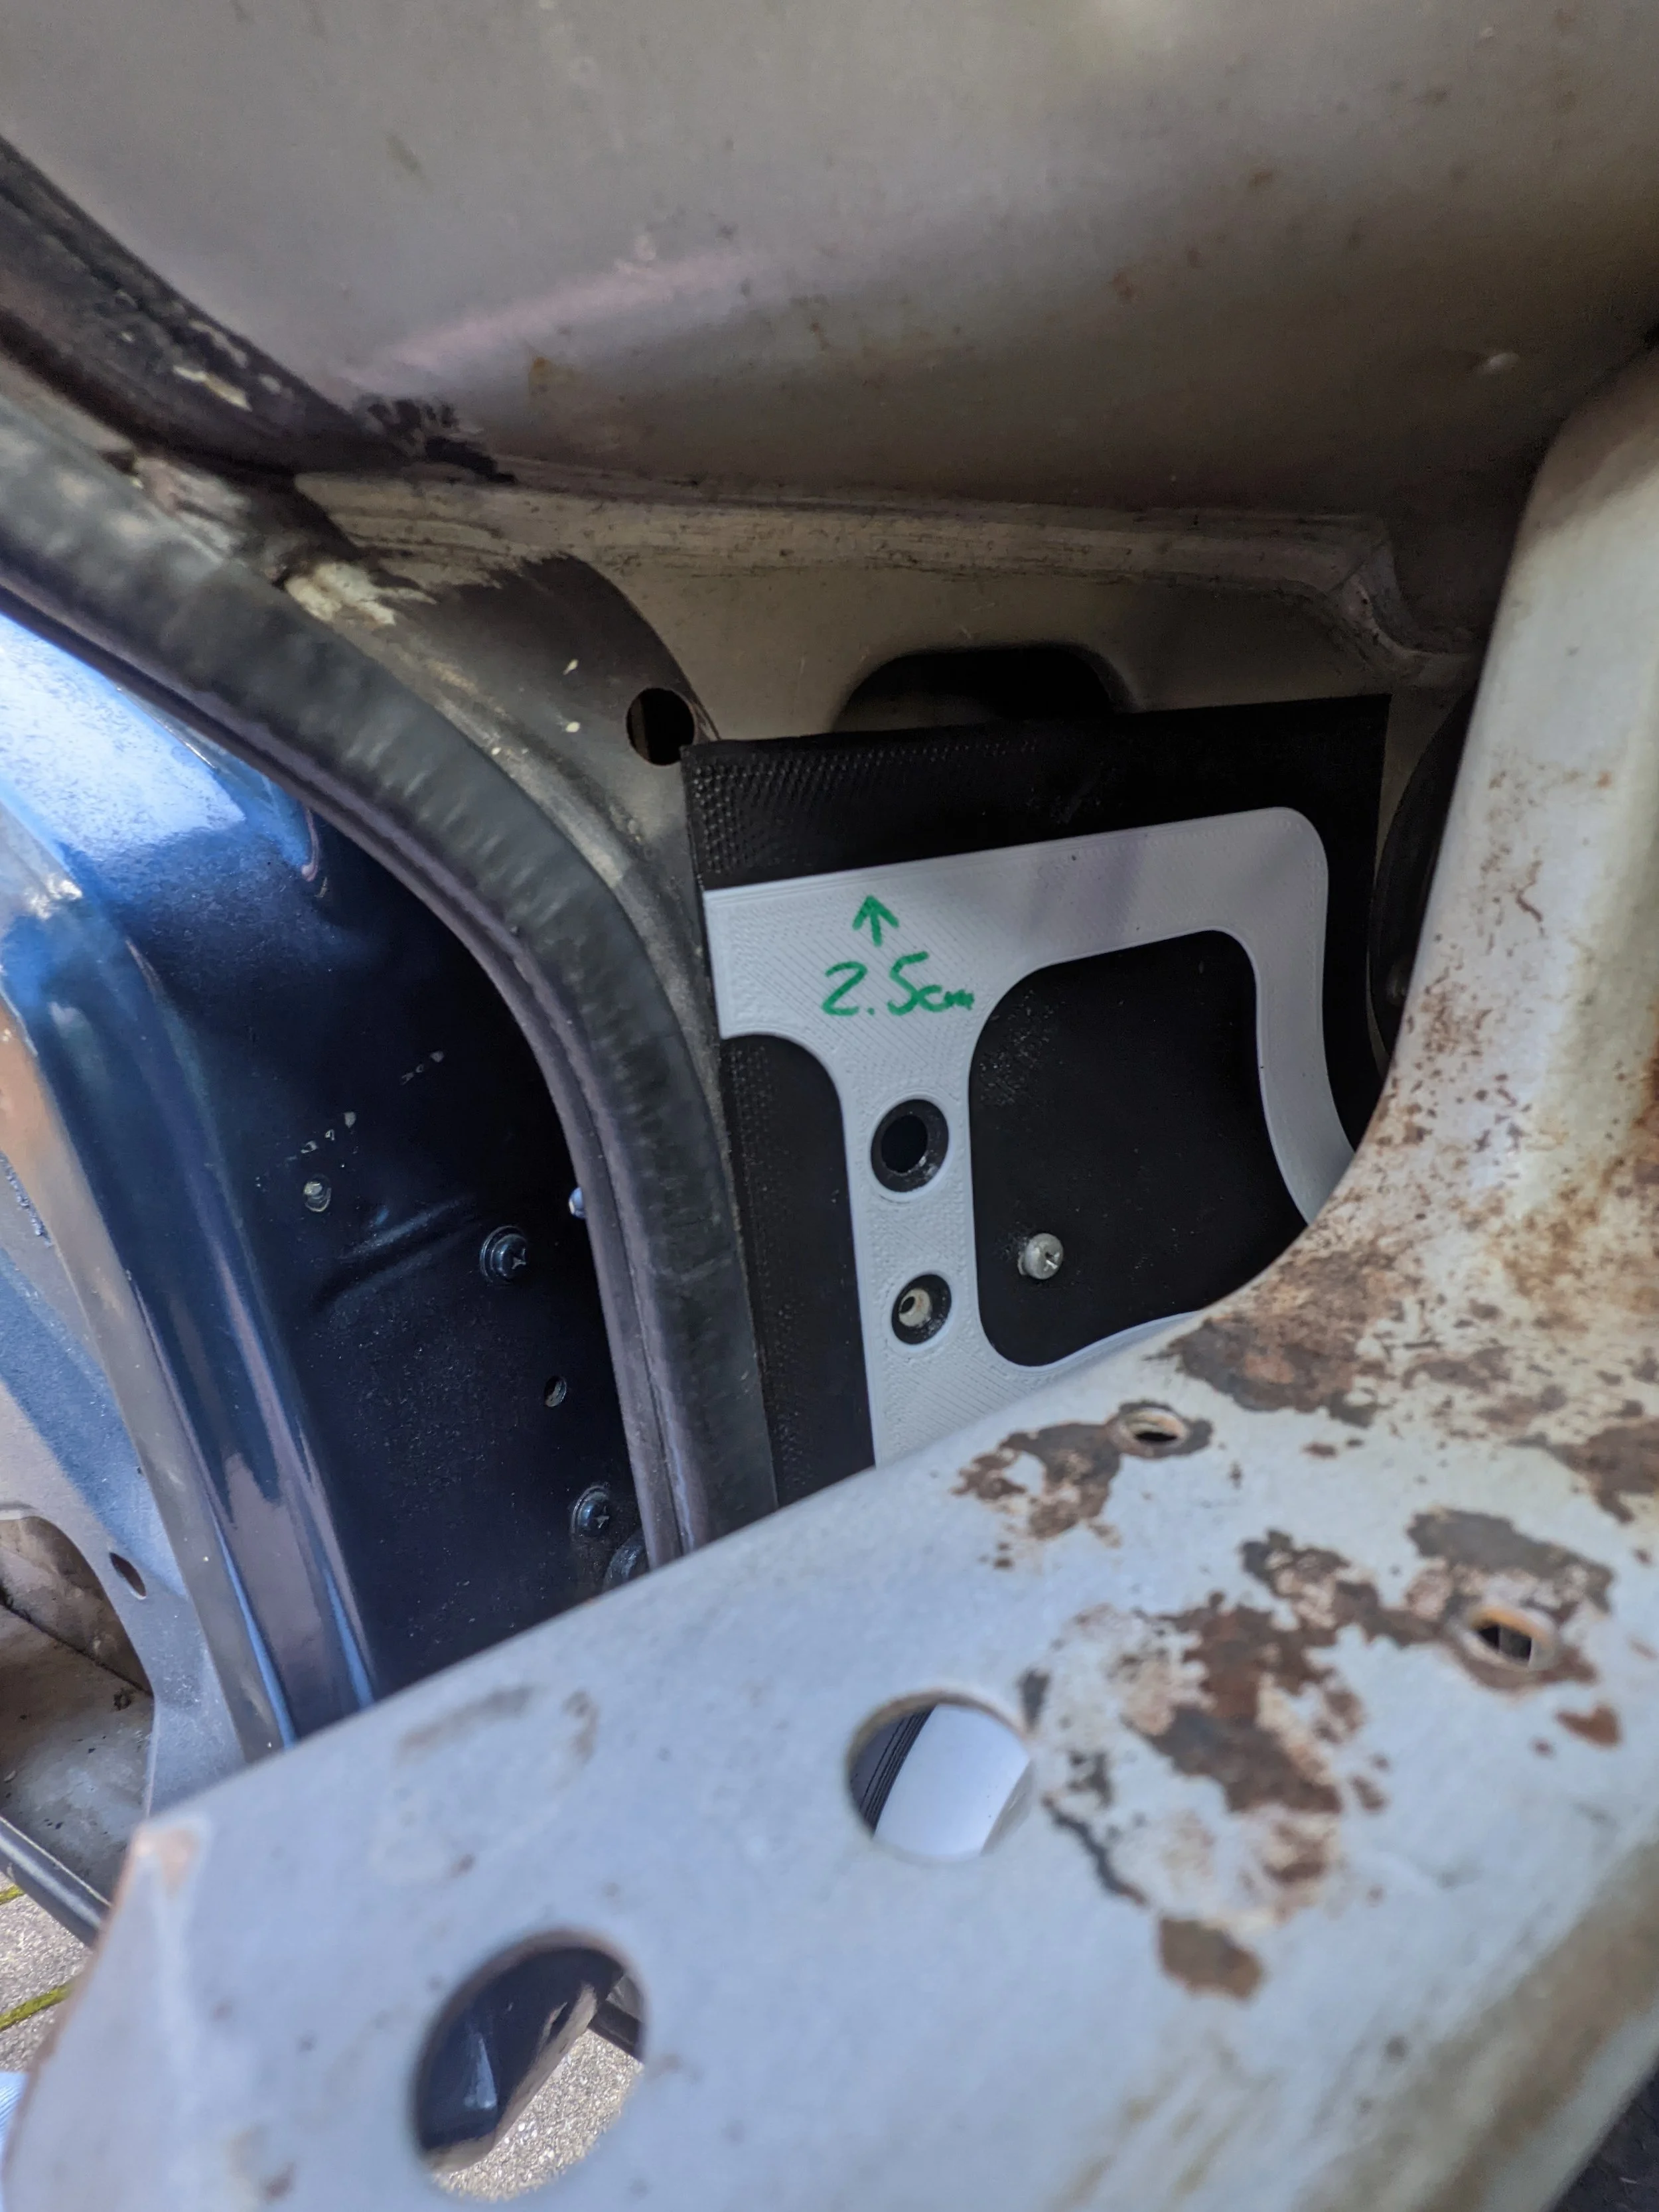
Pictured here is the first prototype with markups for adjustments to make the fitment perfect. The speaker hump had to move down as the rear of the speaker protruded, and my plan was to make it sit in that little cutout for the door hinge to make the speaker not hang out so much, so as not to sacrifice too much footwell space.
Additionally, the profile needed some extra curves along the edges to fit the car's body better than the original did. So, after marking all that up and taking reference photos, it was time for prototype 2.

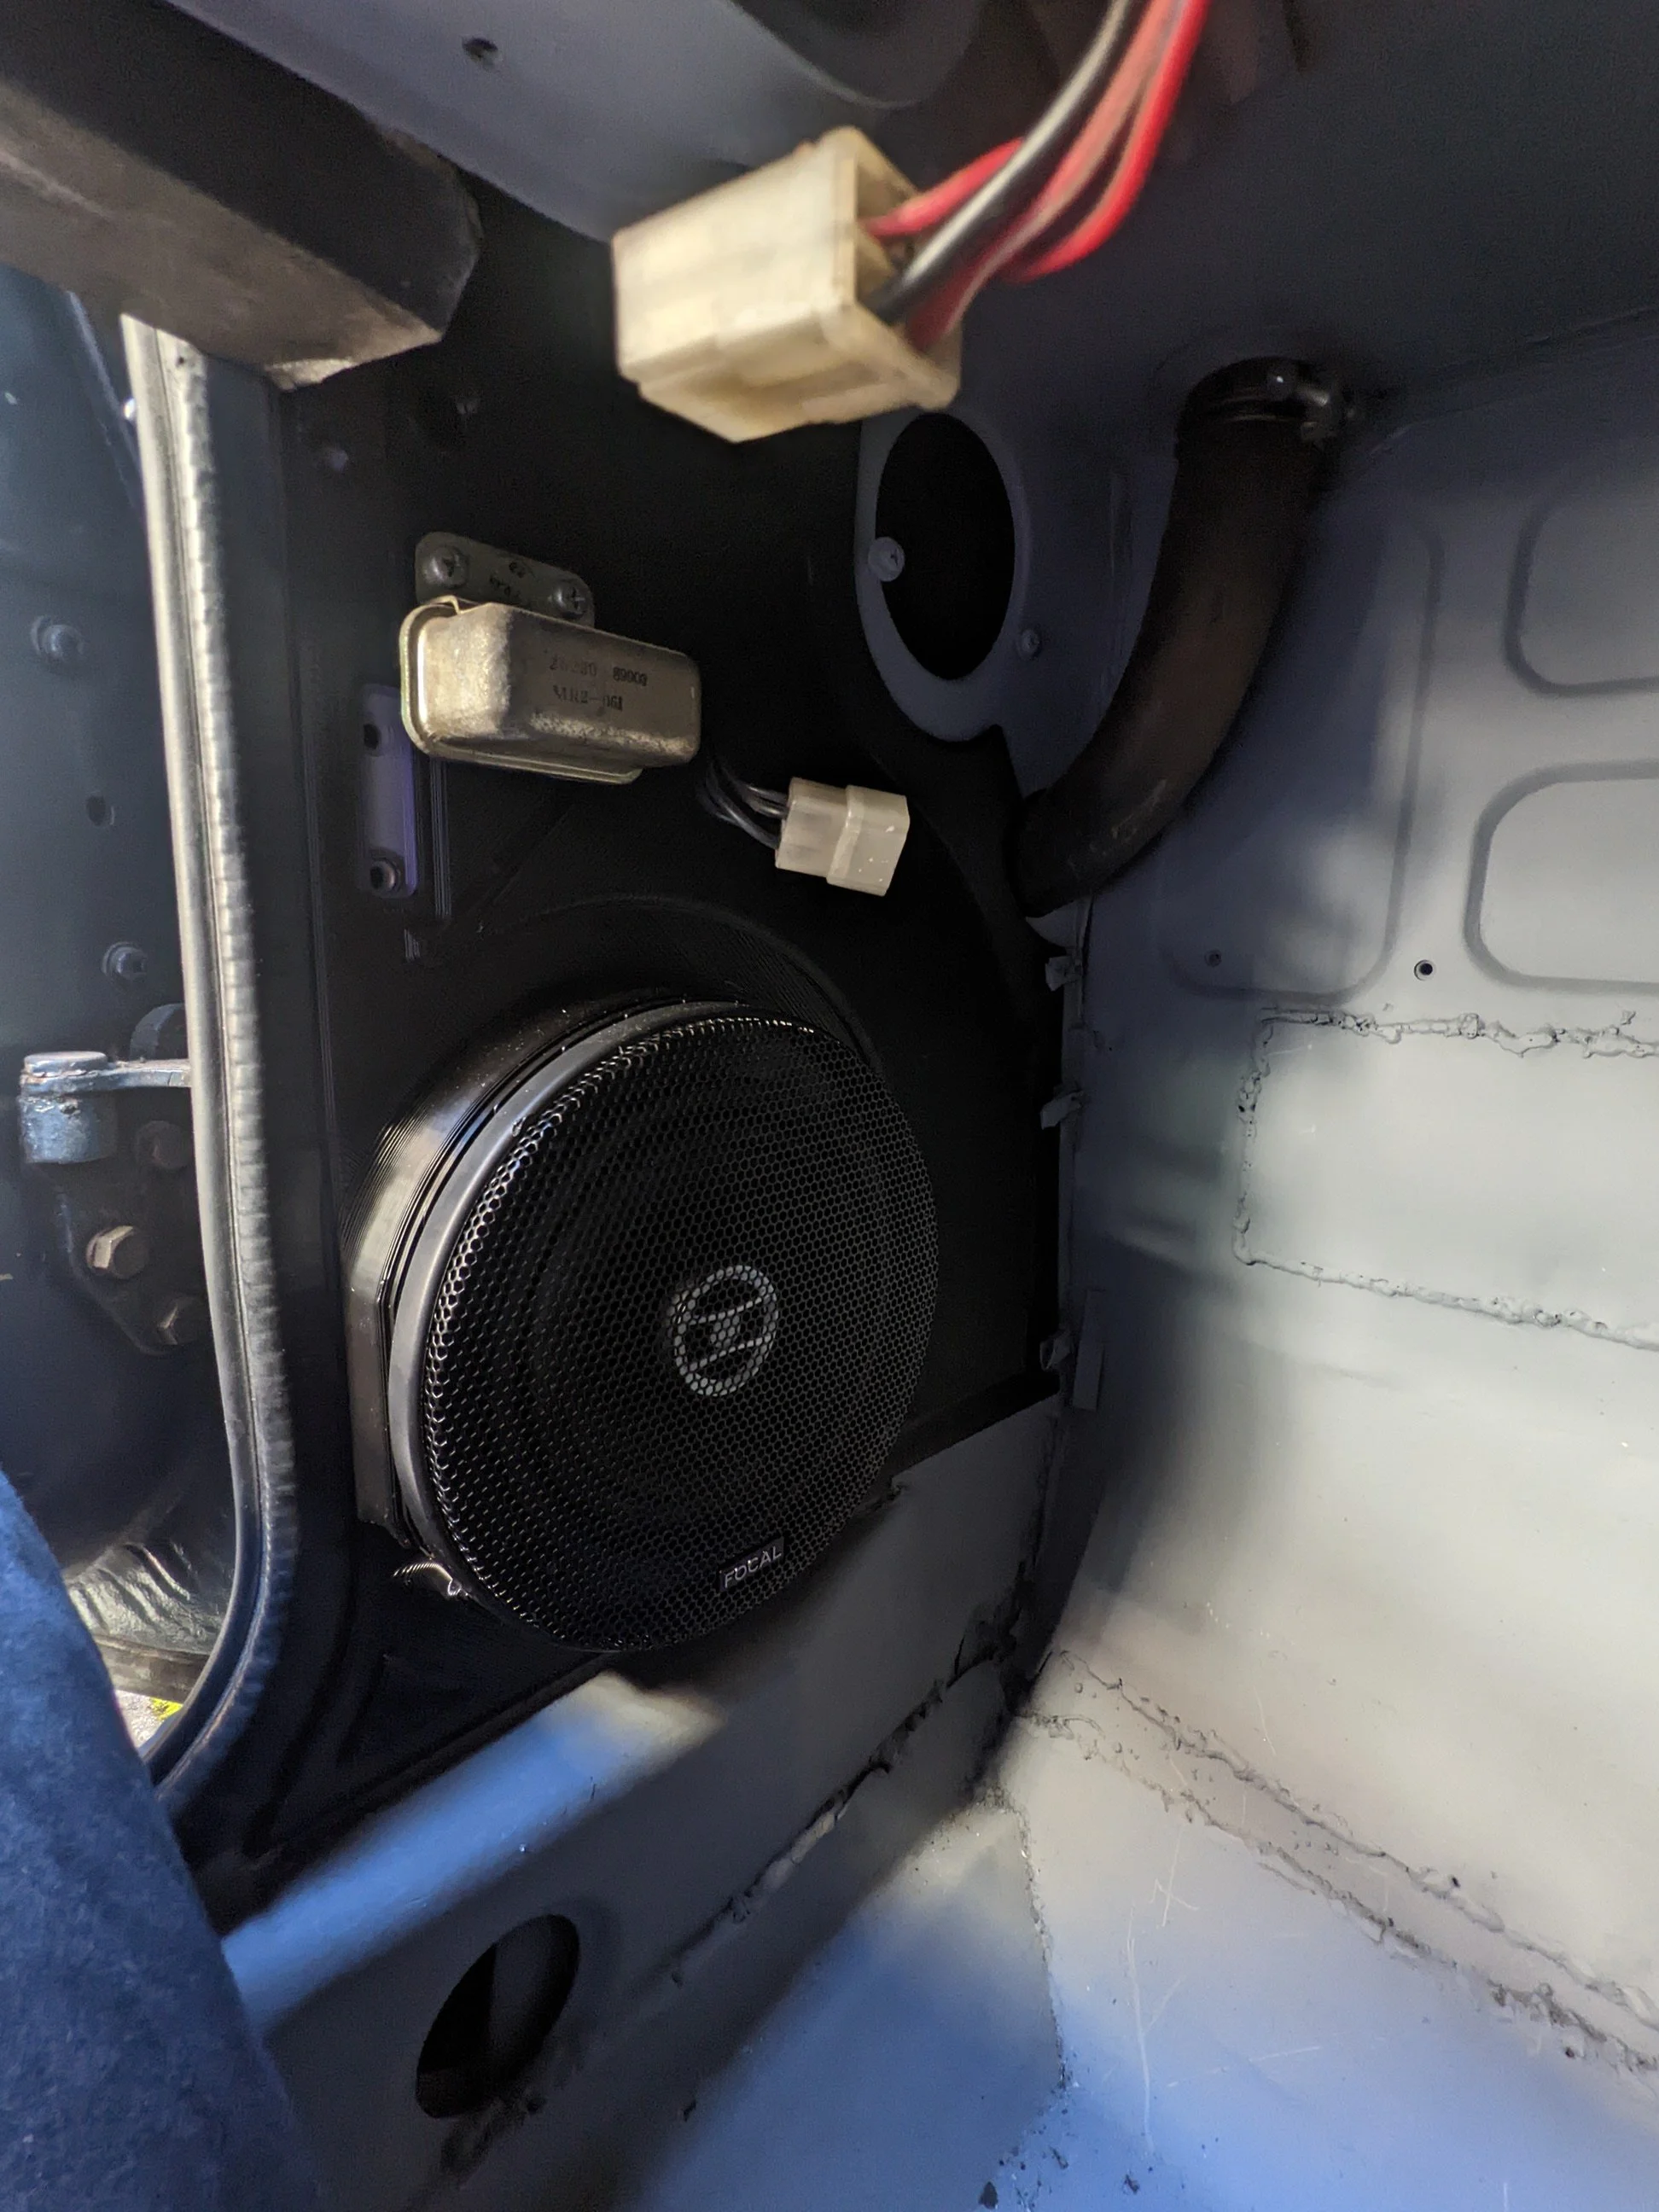
With the second prototype, I was able to get the speaker fitted into the previously mentioned cutout and fit all the original parts back onto the panel so I could be certain the fit was as good as I could get it.
The speaker hump needed a bit more of a rim to fit the speaker grill seamlessly, but aside from that, the fit was perfect.
You may think that extra extruded sections look a bit off, but they are purely structural and help add rigidity to the part, as the panel would have been flimsy without the extra thickness. And once painted black, they aren’t nearly as noticeable.
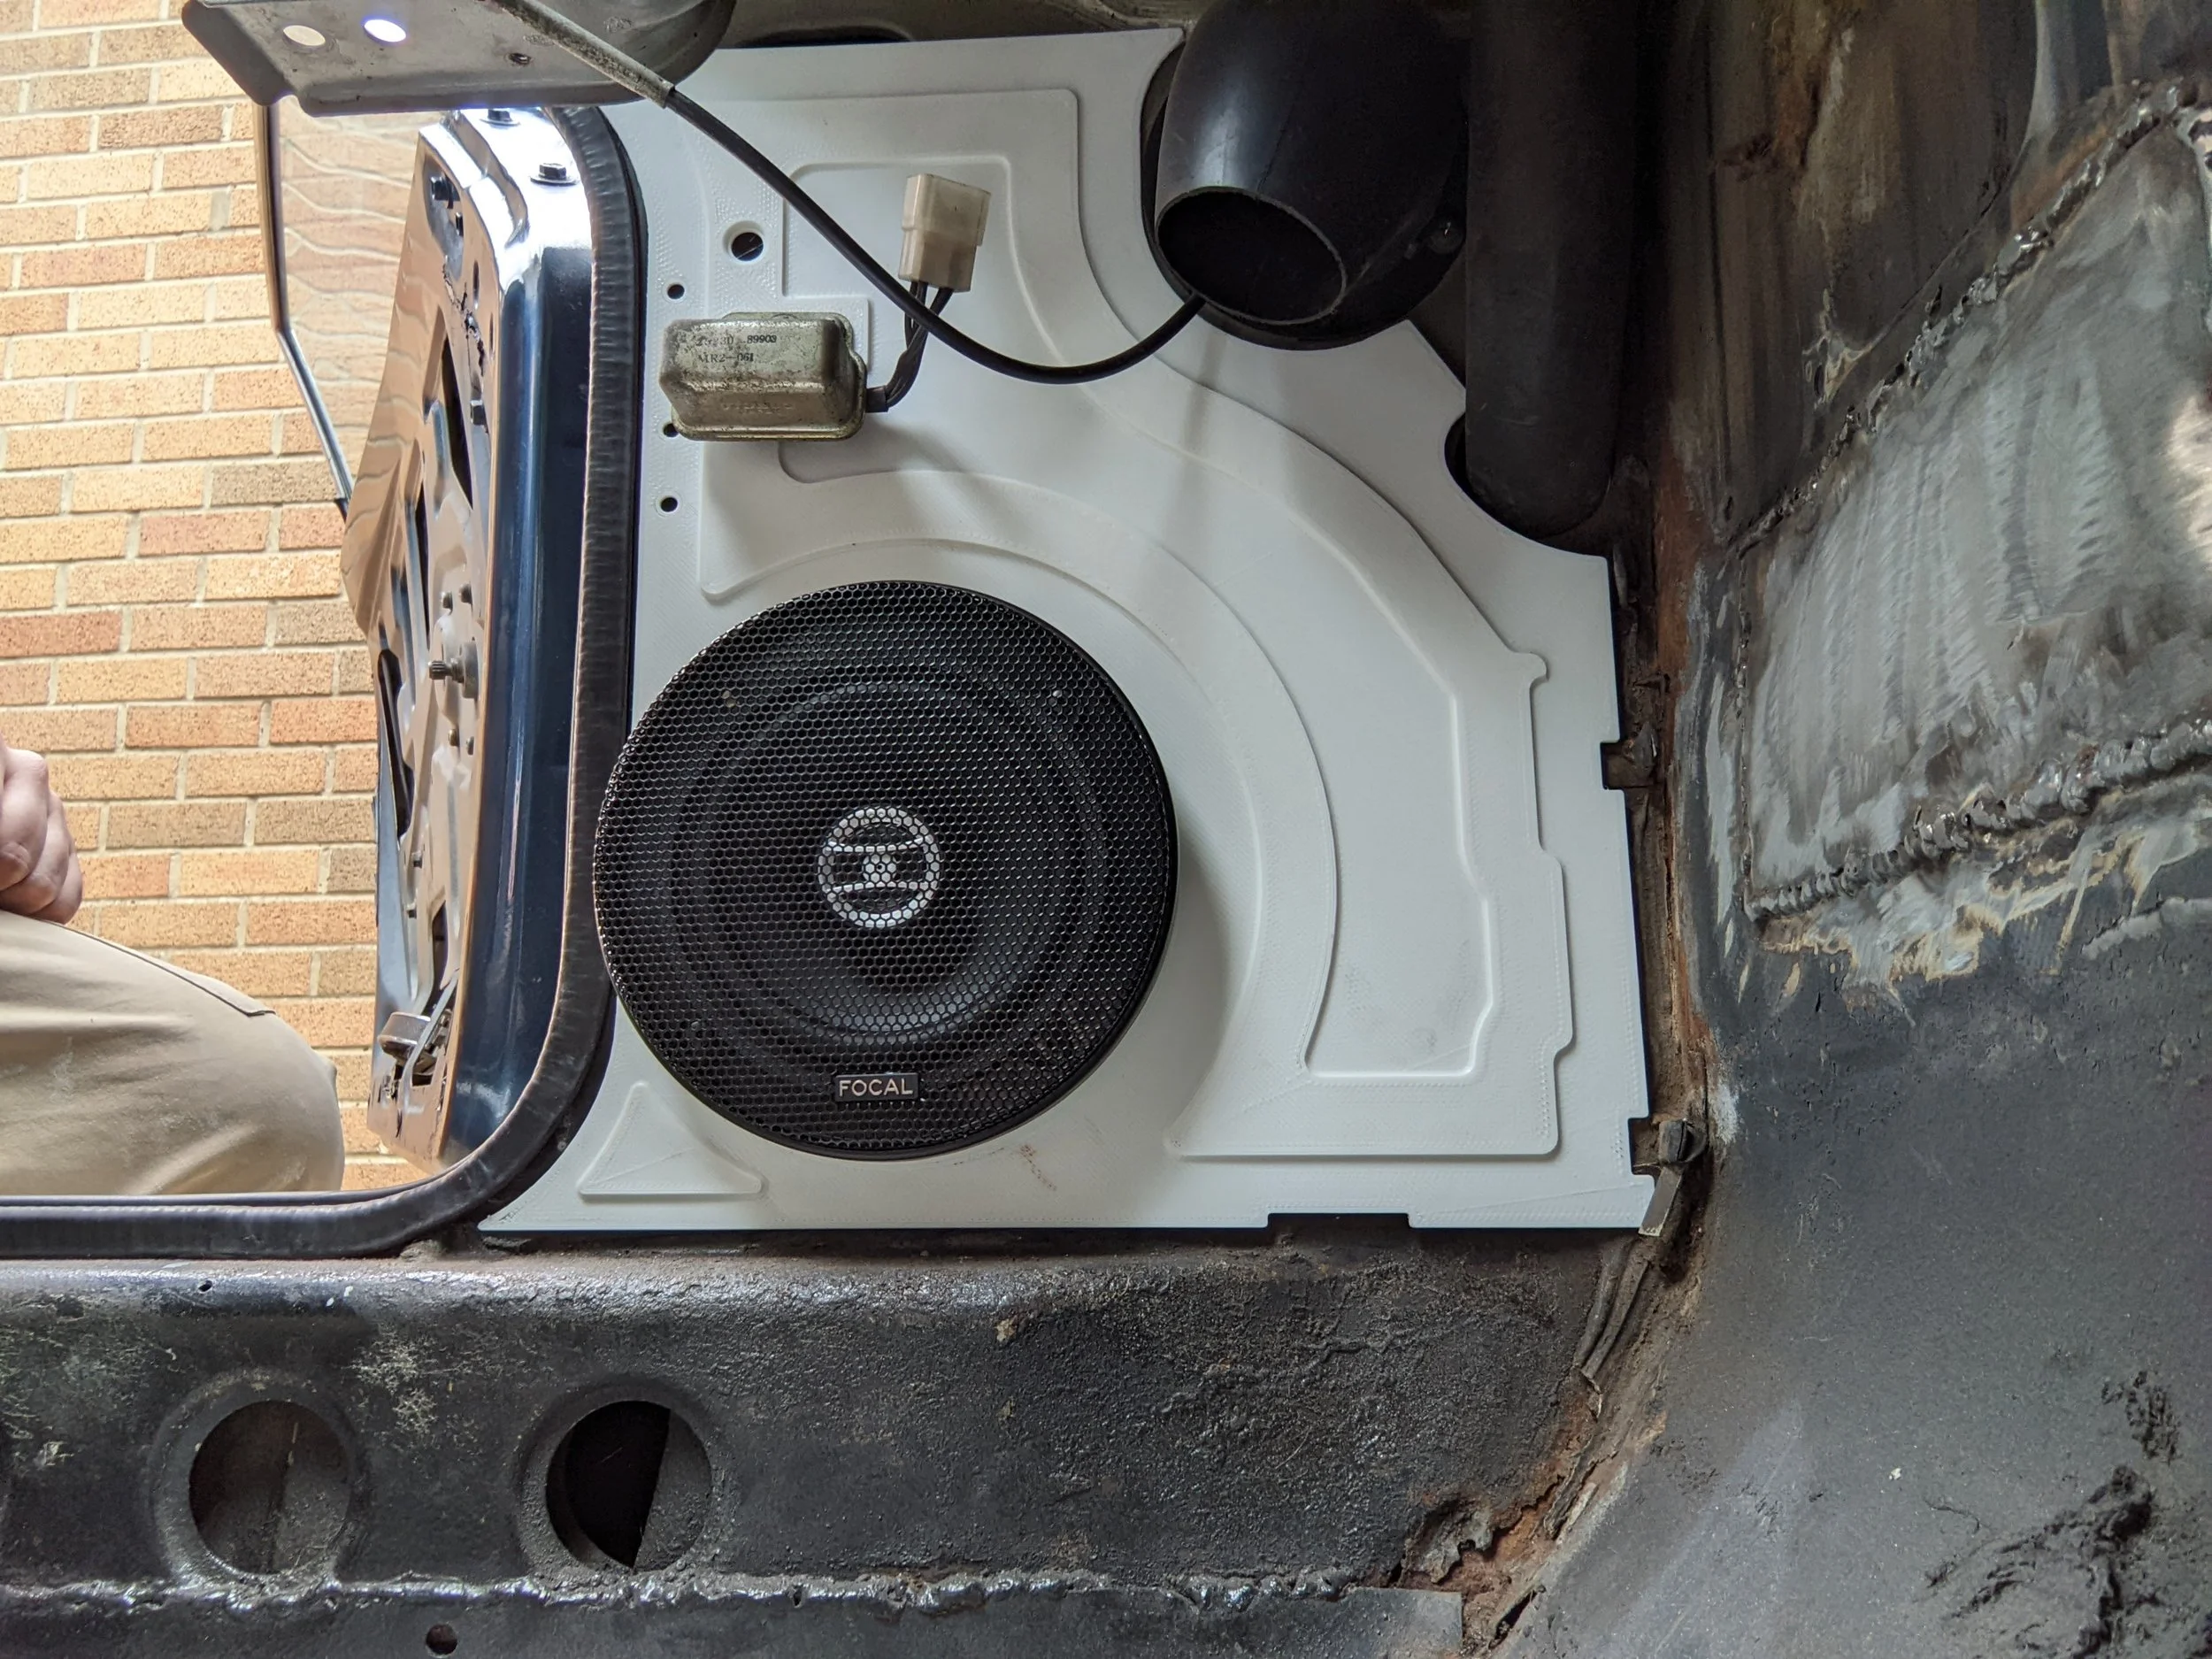
Final Product
After some bodywork repairs, the final panel was added into the car and I have to say, I may have outdone myself here because that is flawless.
Functional, non-destructive, and totally reversible while being better fitting than the original. What more could you ask for?
Now, just have to wire up the new radio and amp. I’m sure that won’t need bespoke plastic parts, right?
‘Trying to steal my Alpine’
Alpine Amplifier Legs.
So, turns out, trying to put things that weren’t meant for a 1970s car into a 1970s car does include having to fabricate every tiny thing to make them fit.
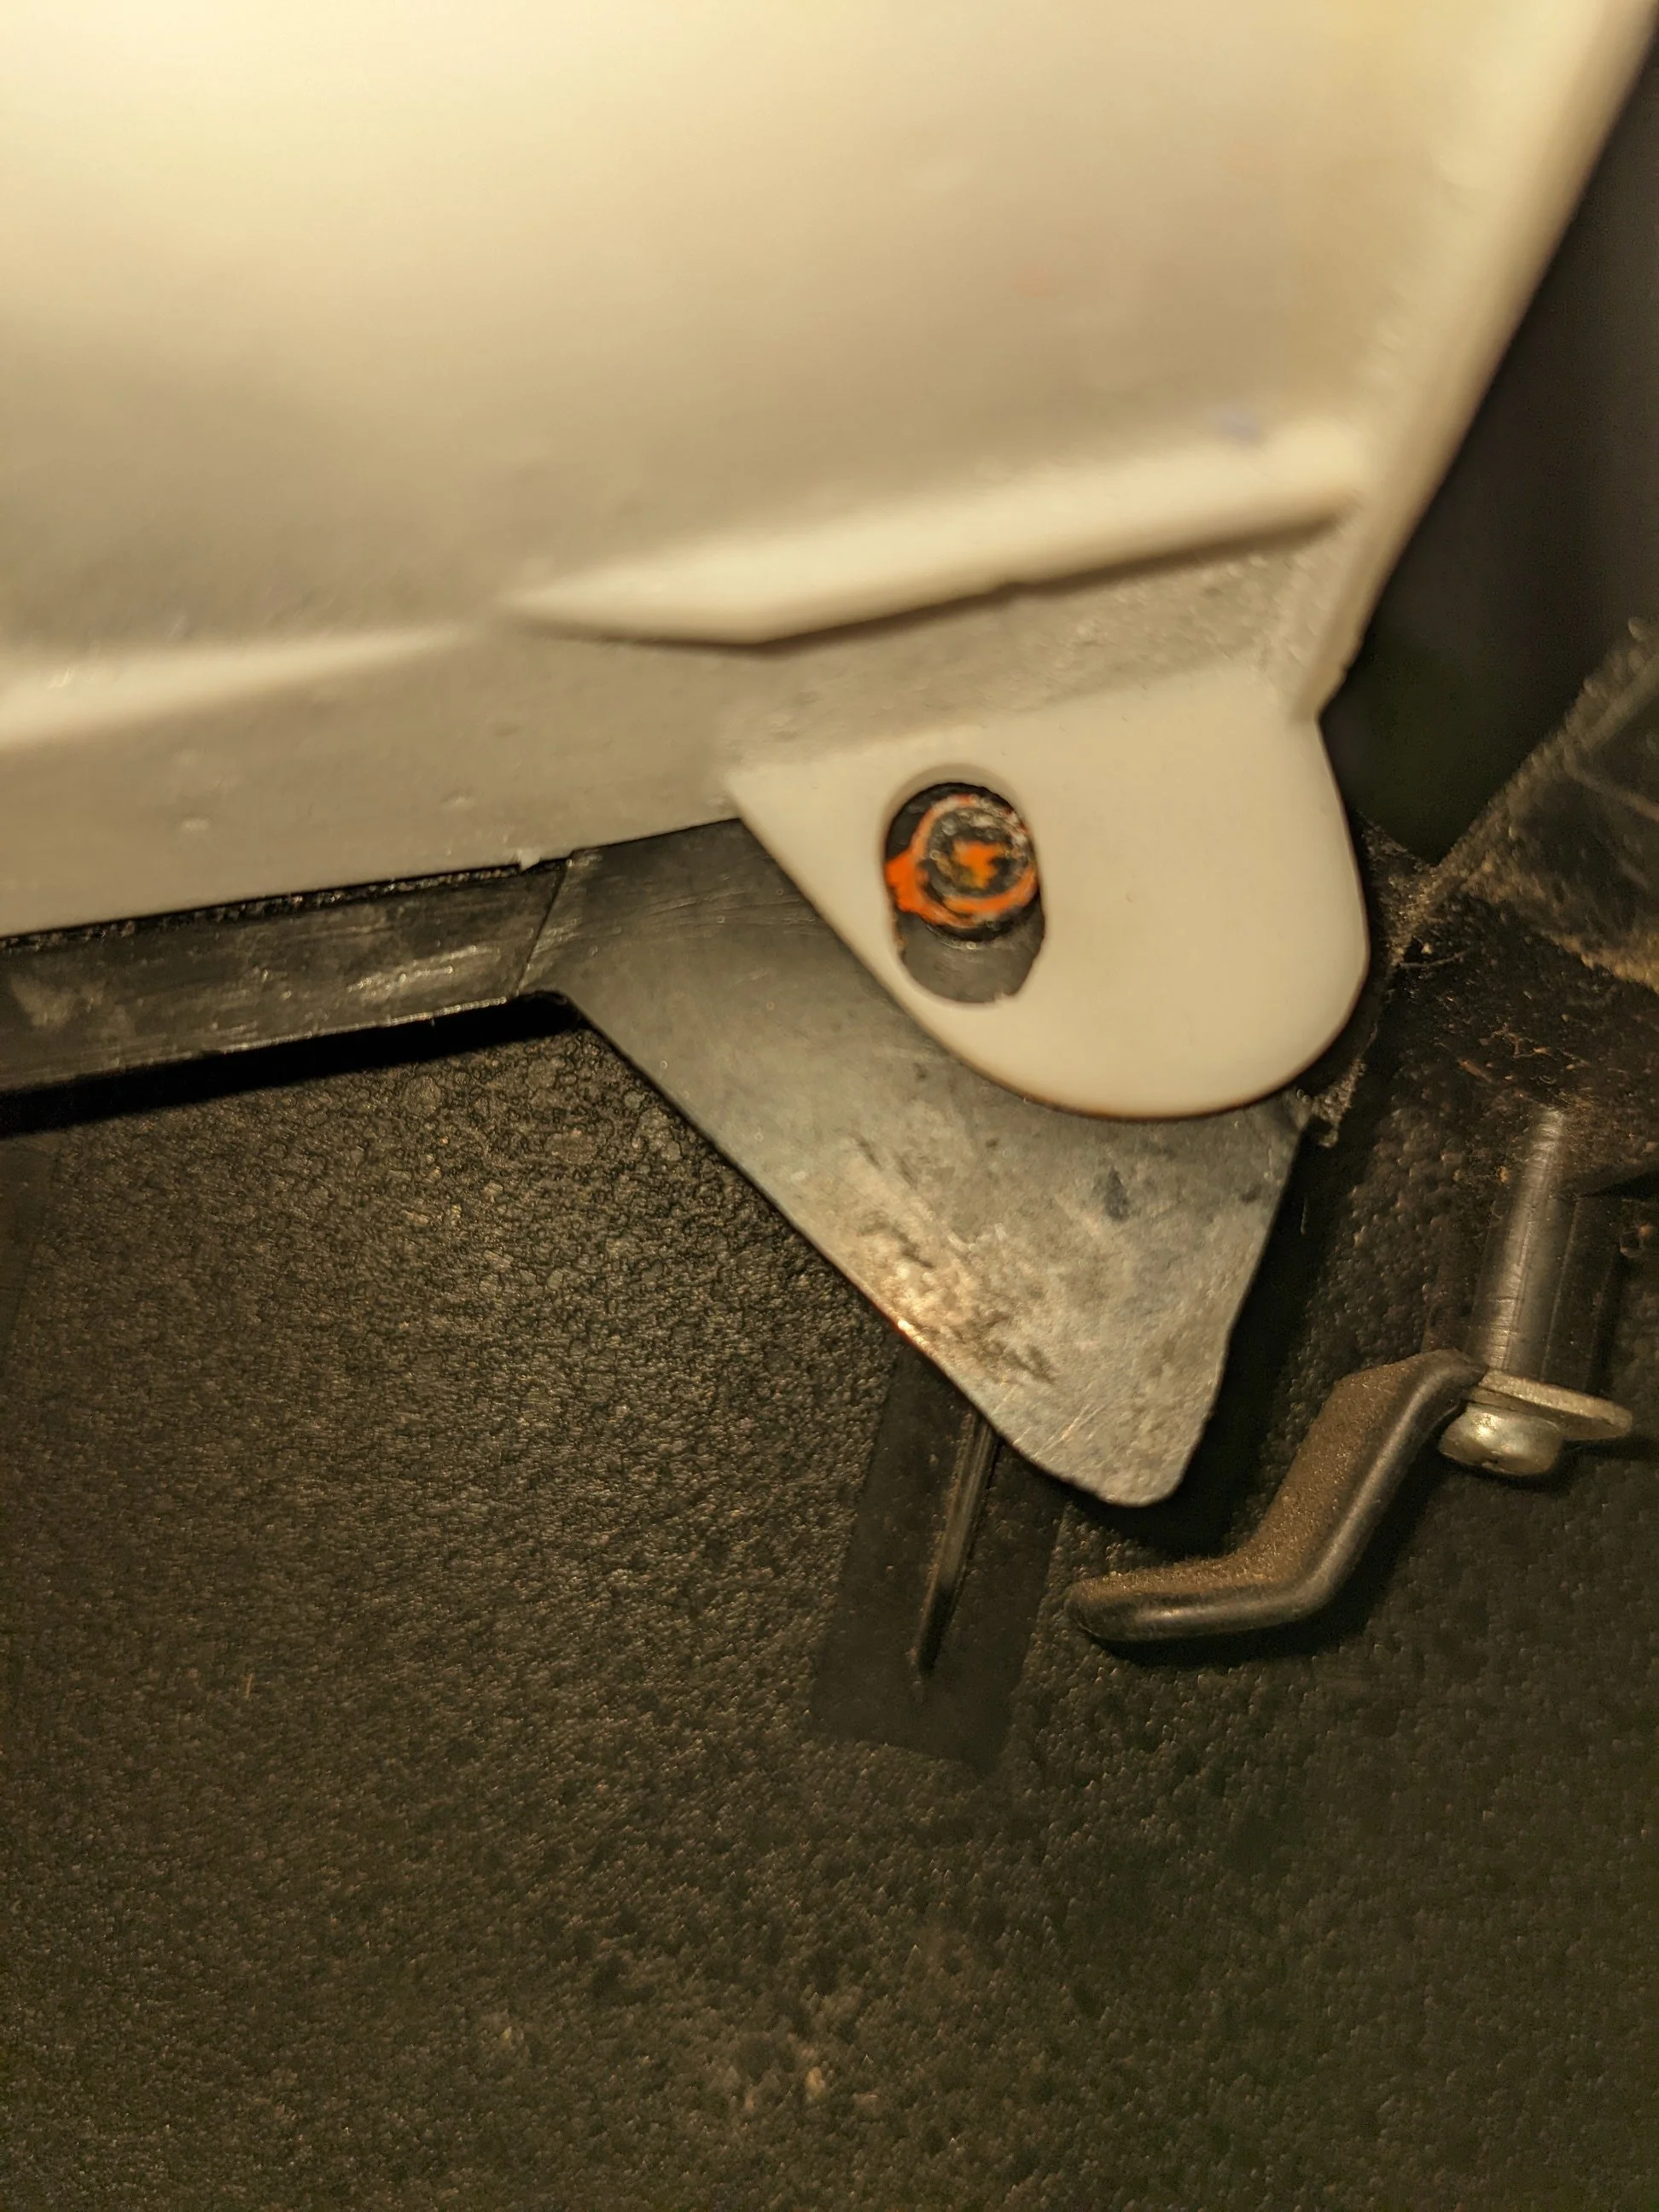
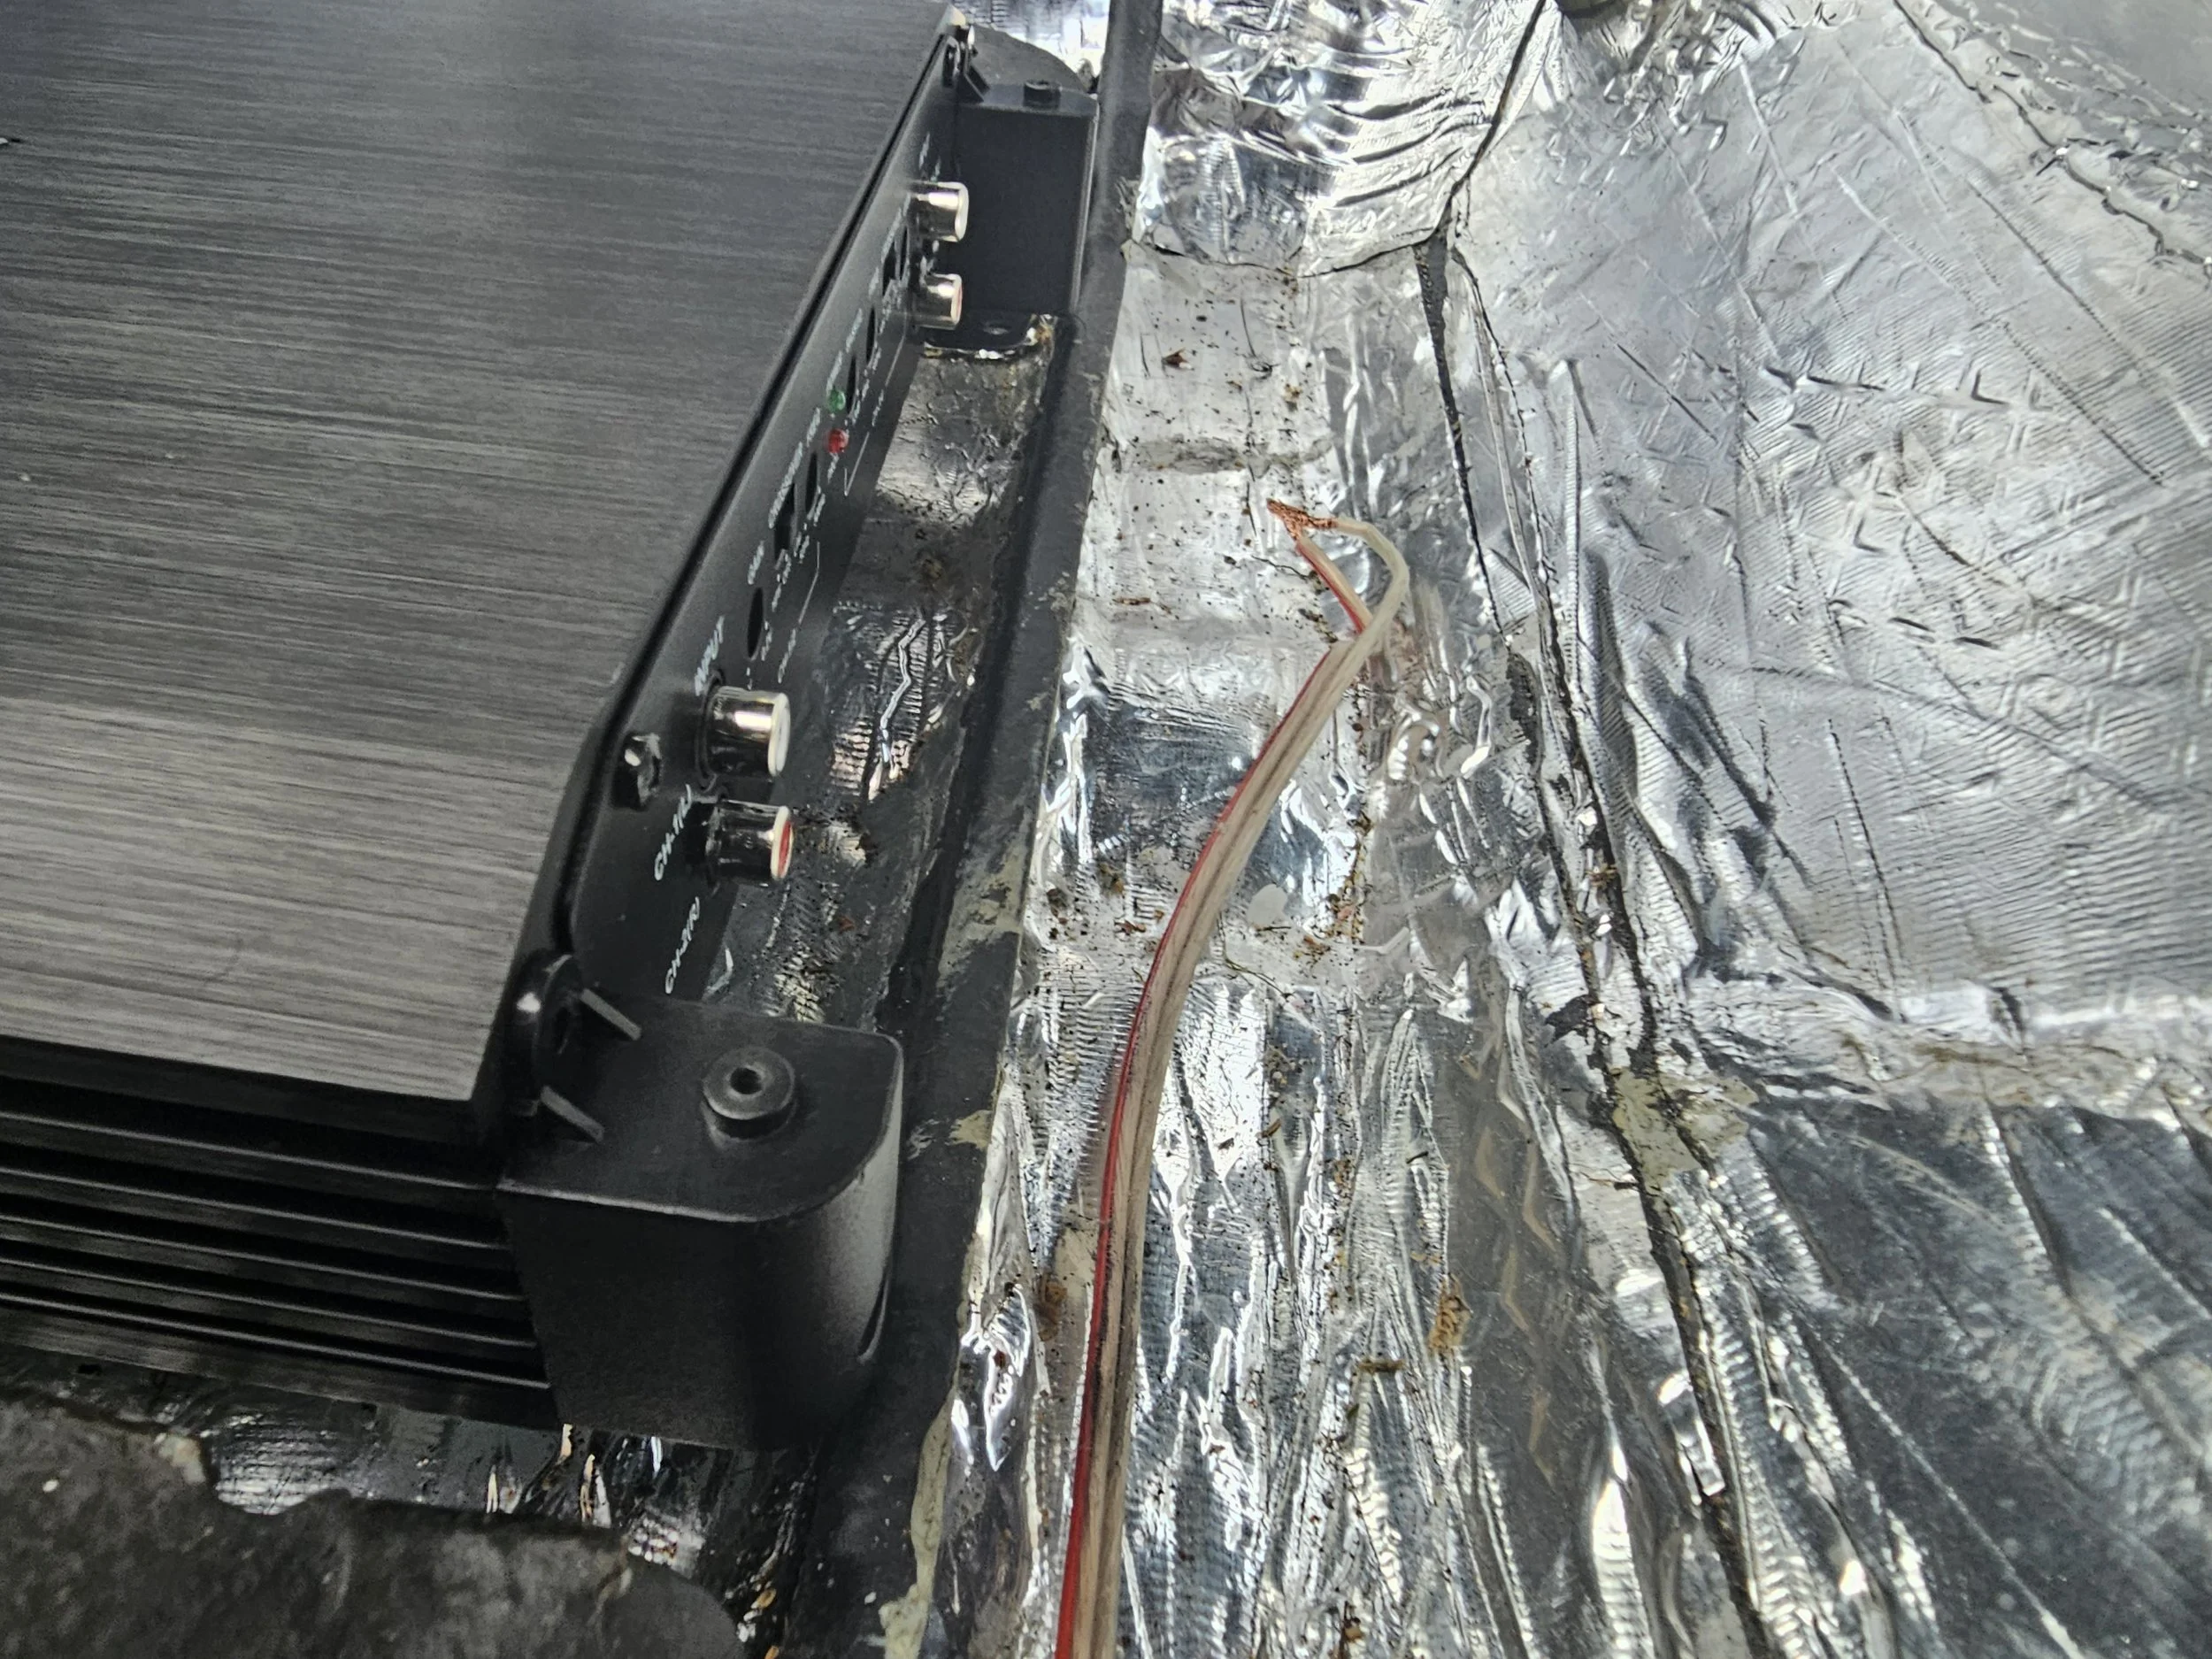
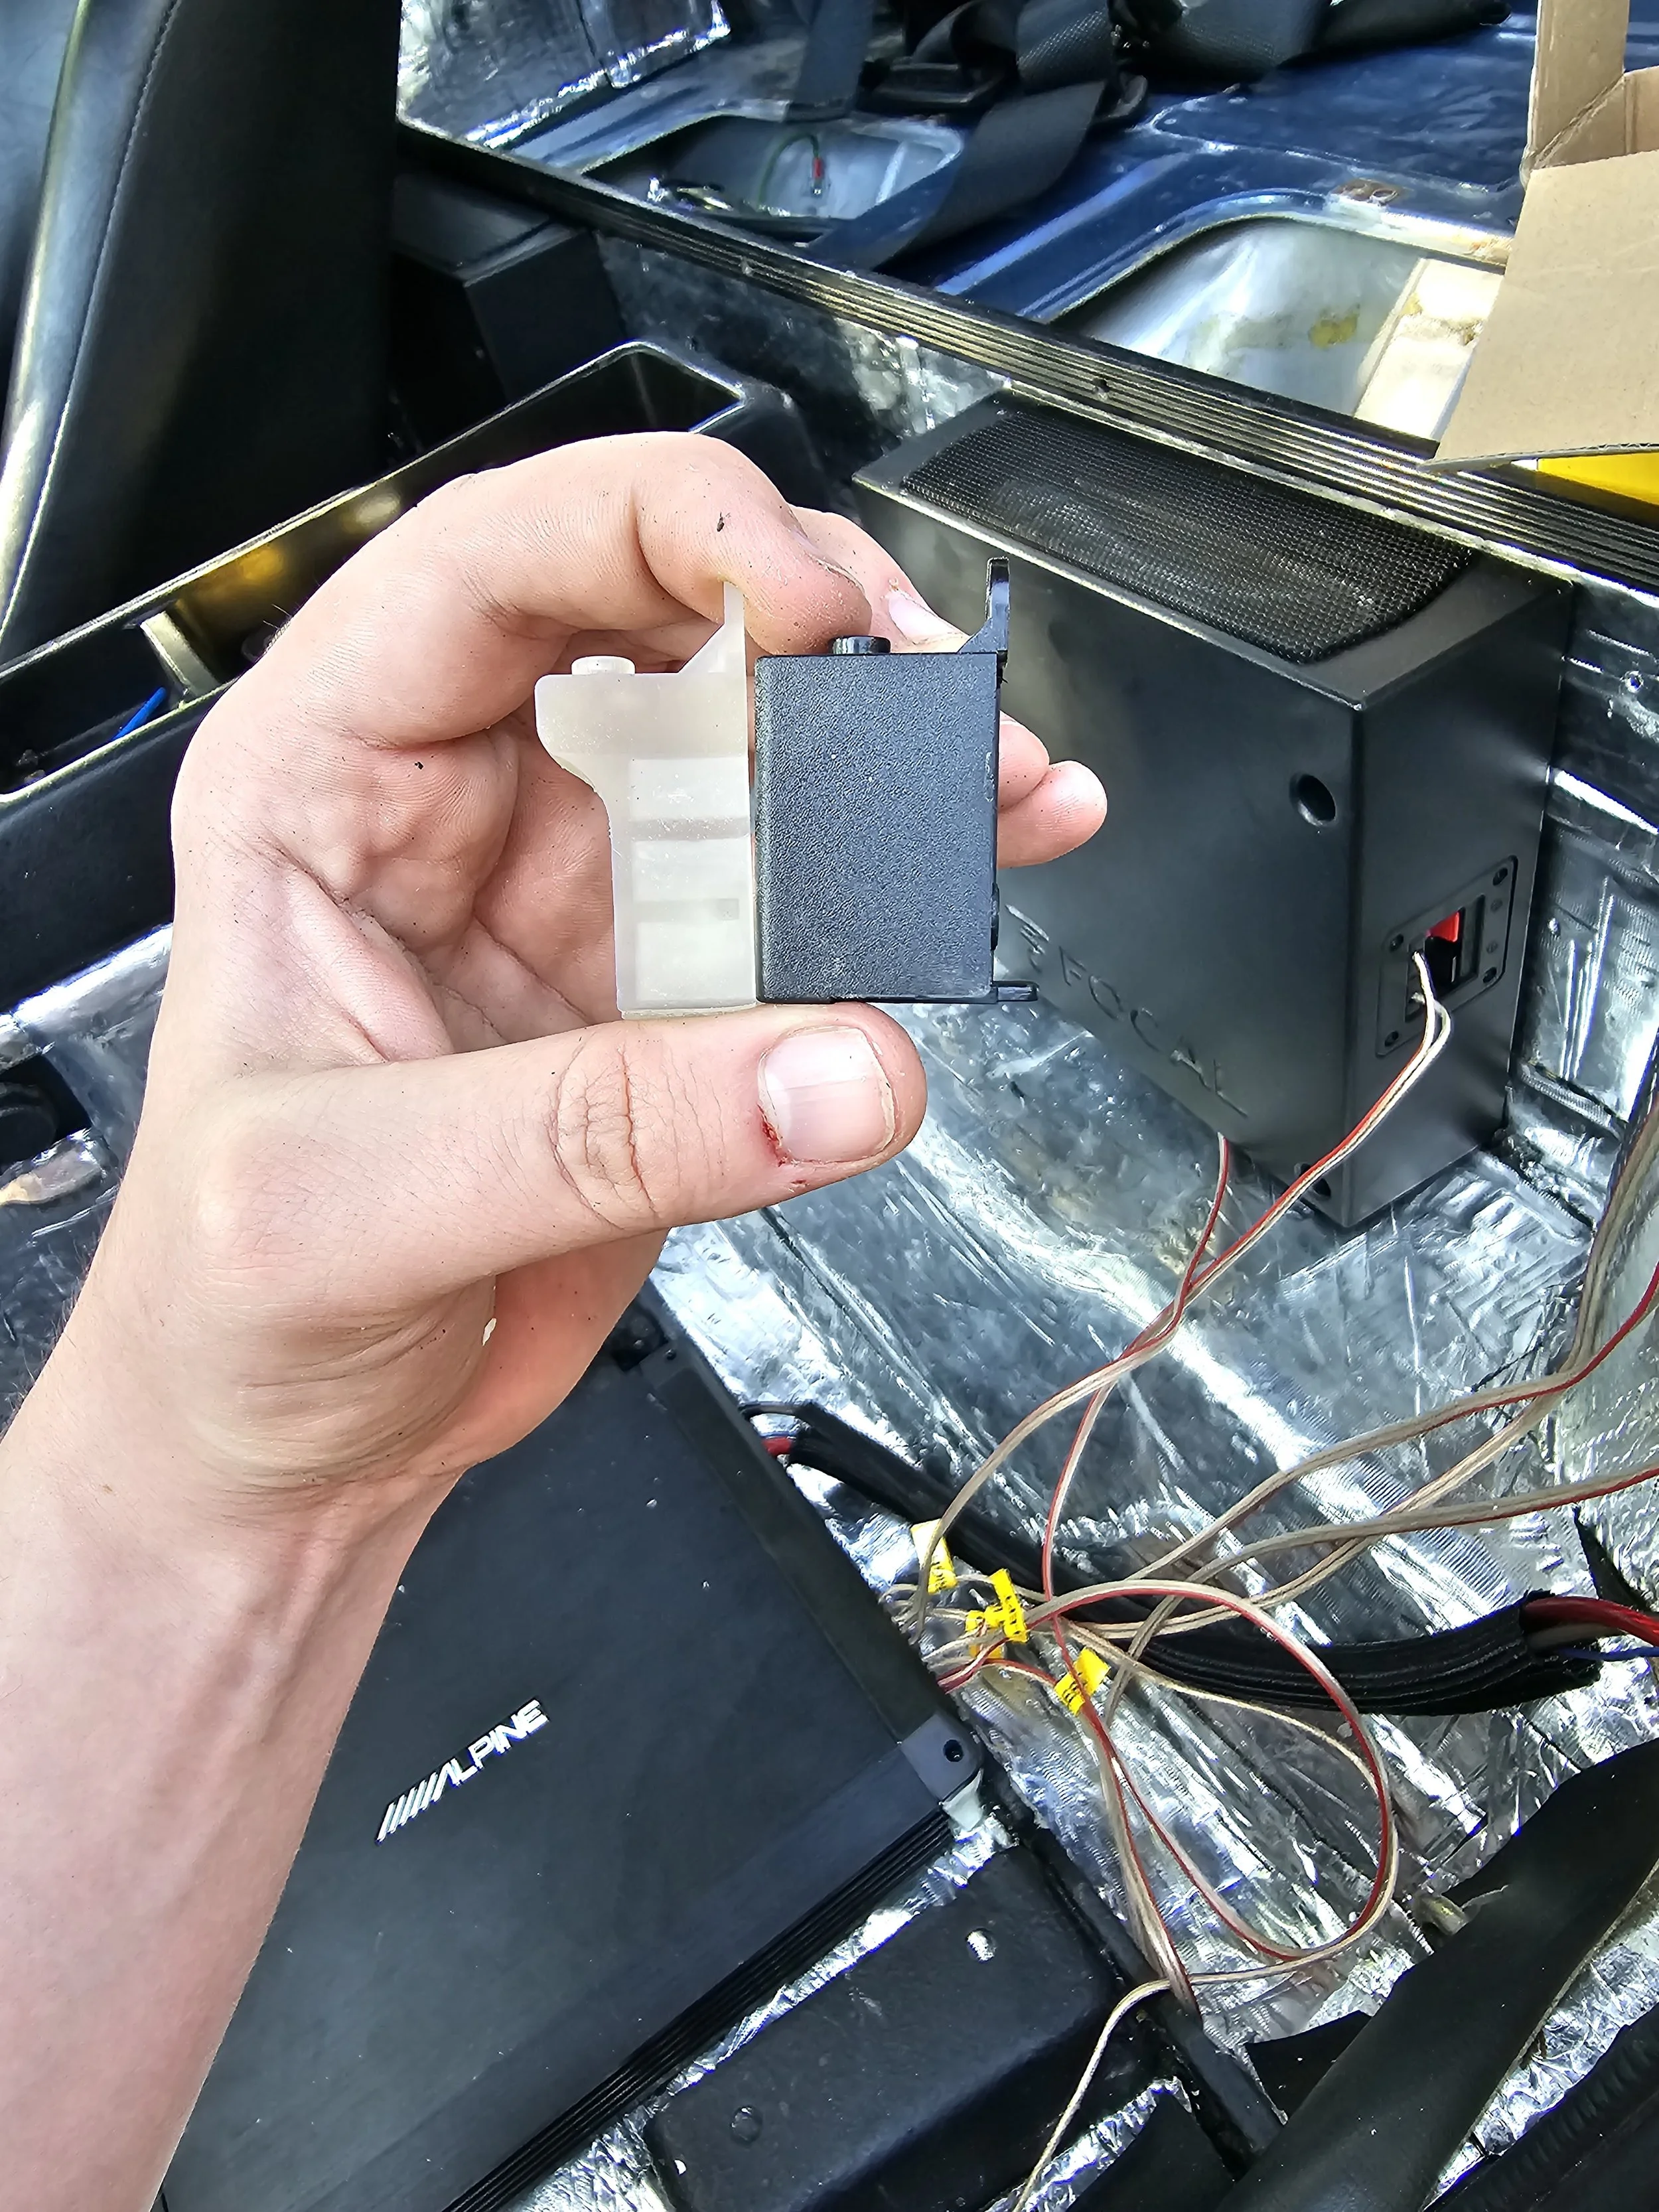
Thankfully, this was an easy, quick job. The Alpine amplifier I had chosen to go under the passenger's seat fit… on paper. But when I got the amp, the plastic guard feet fouled with the seat mounting brace, and to be able to actually plug in the cables, I would’ve had to drill out holes in the brace.
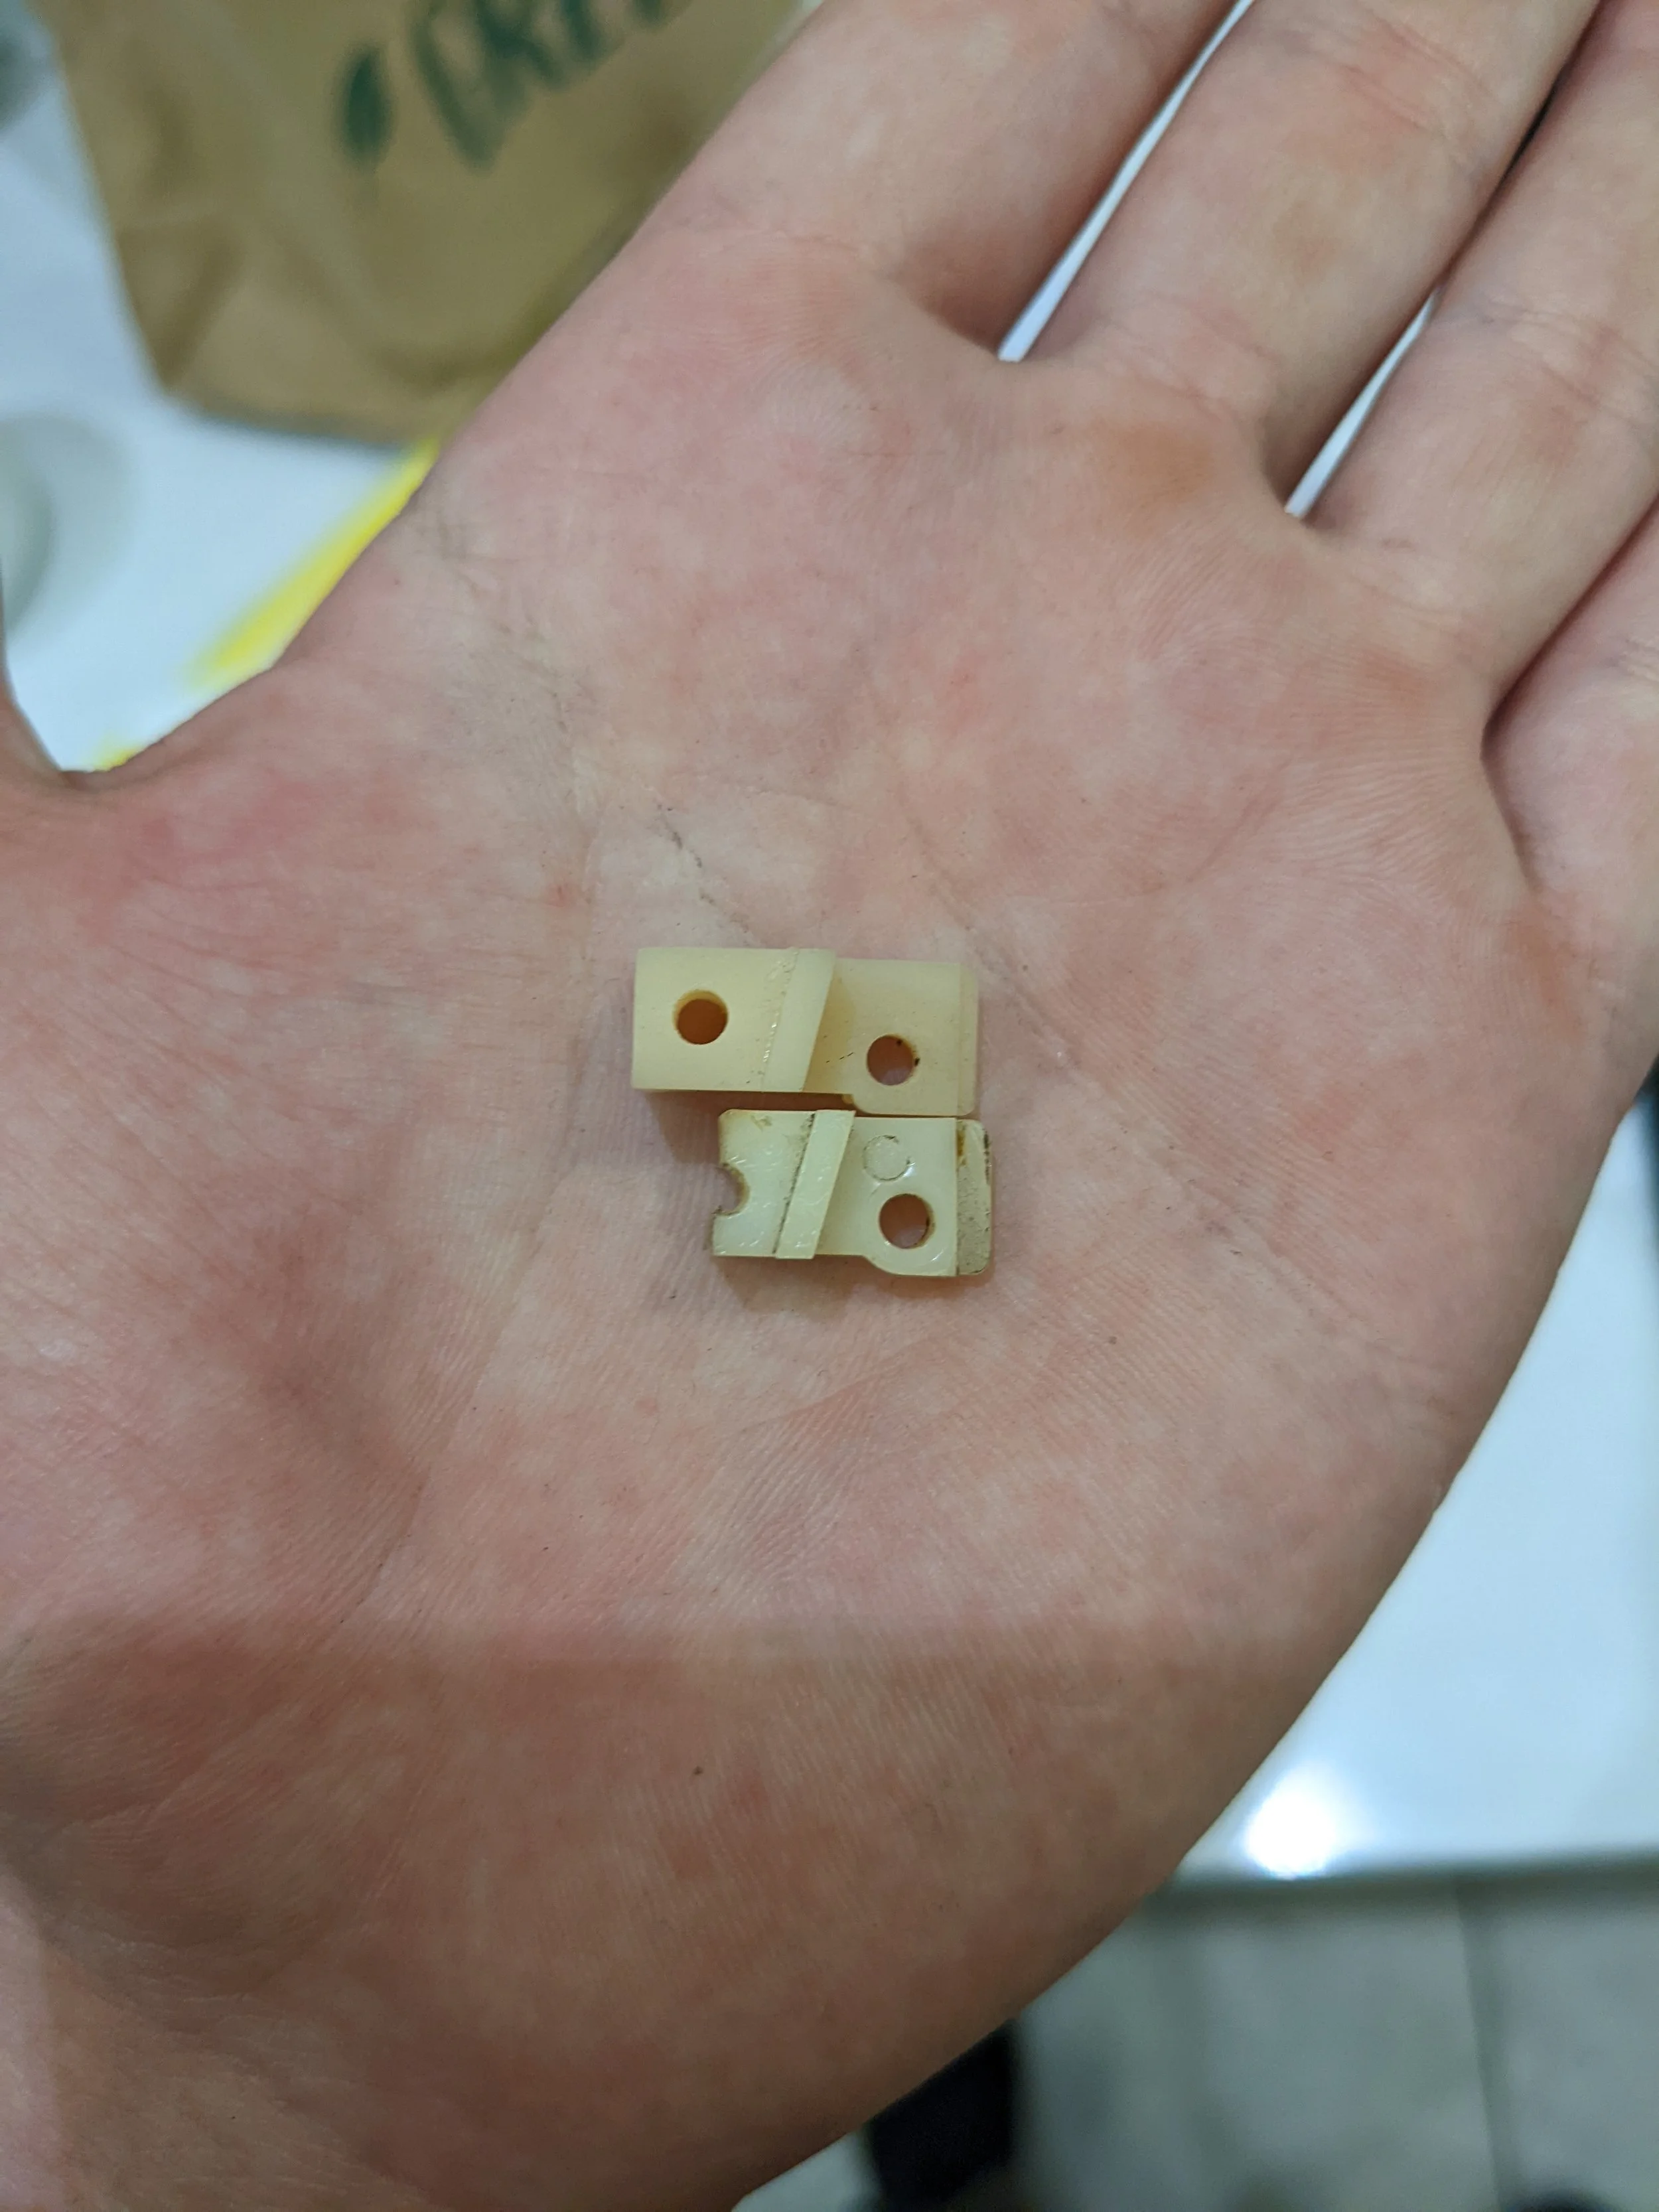
Rather than doing all that, I just took the plastic legs off the amp, measured them, and made them thinner to clear the brace while still fitting under the seat.
No prototypes needed here, as it was a simple enough model.
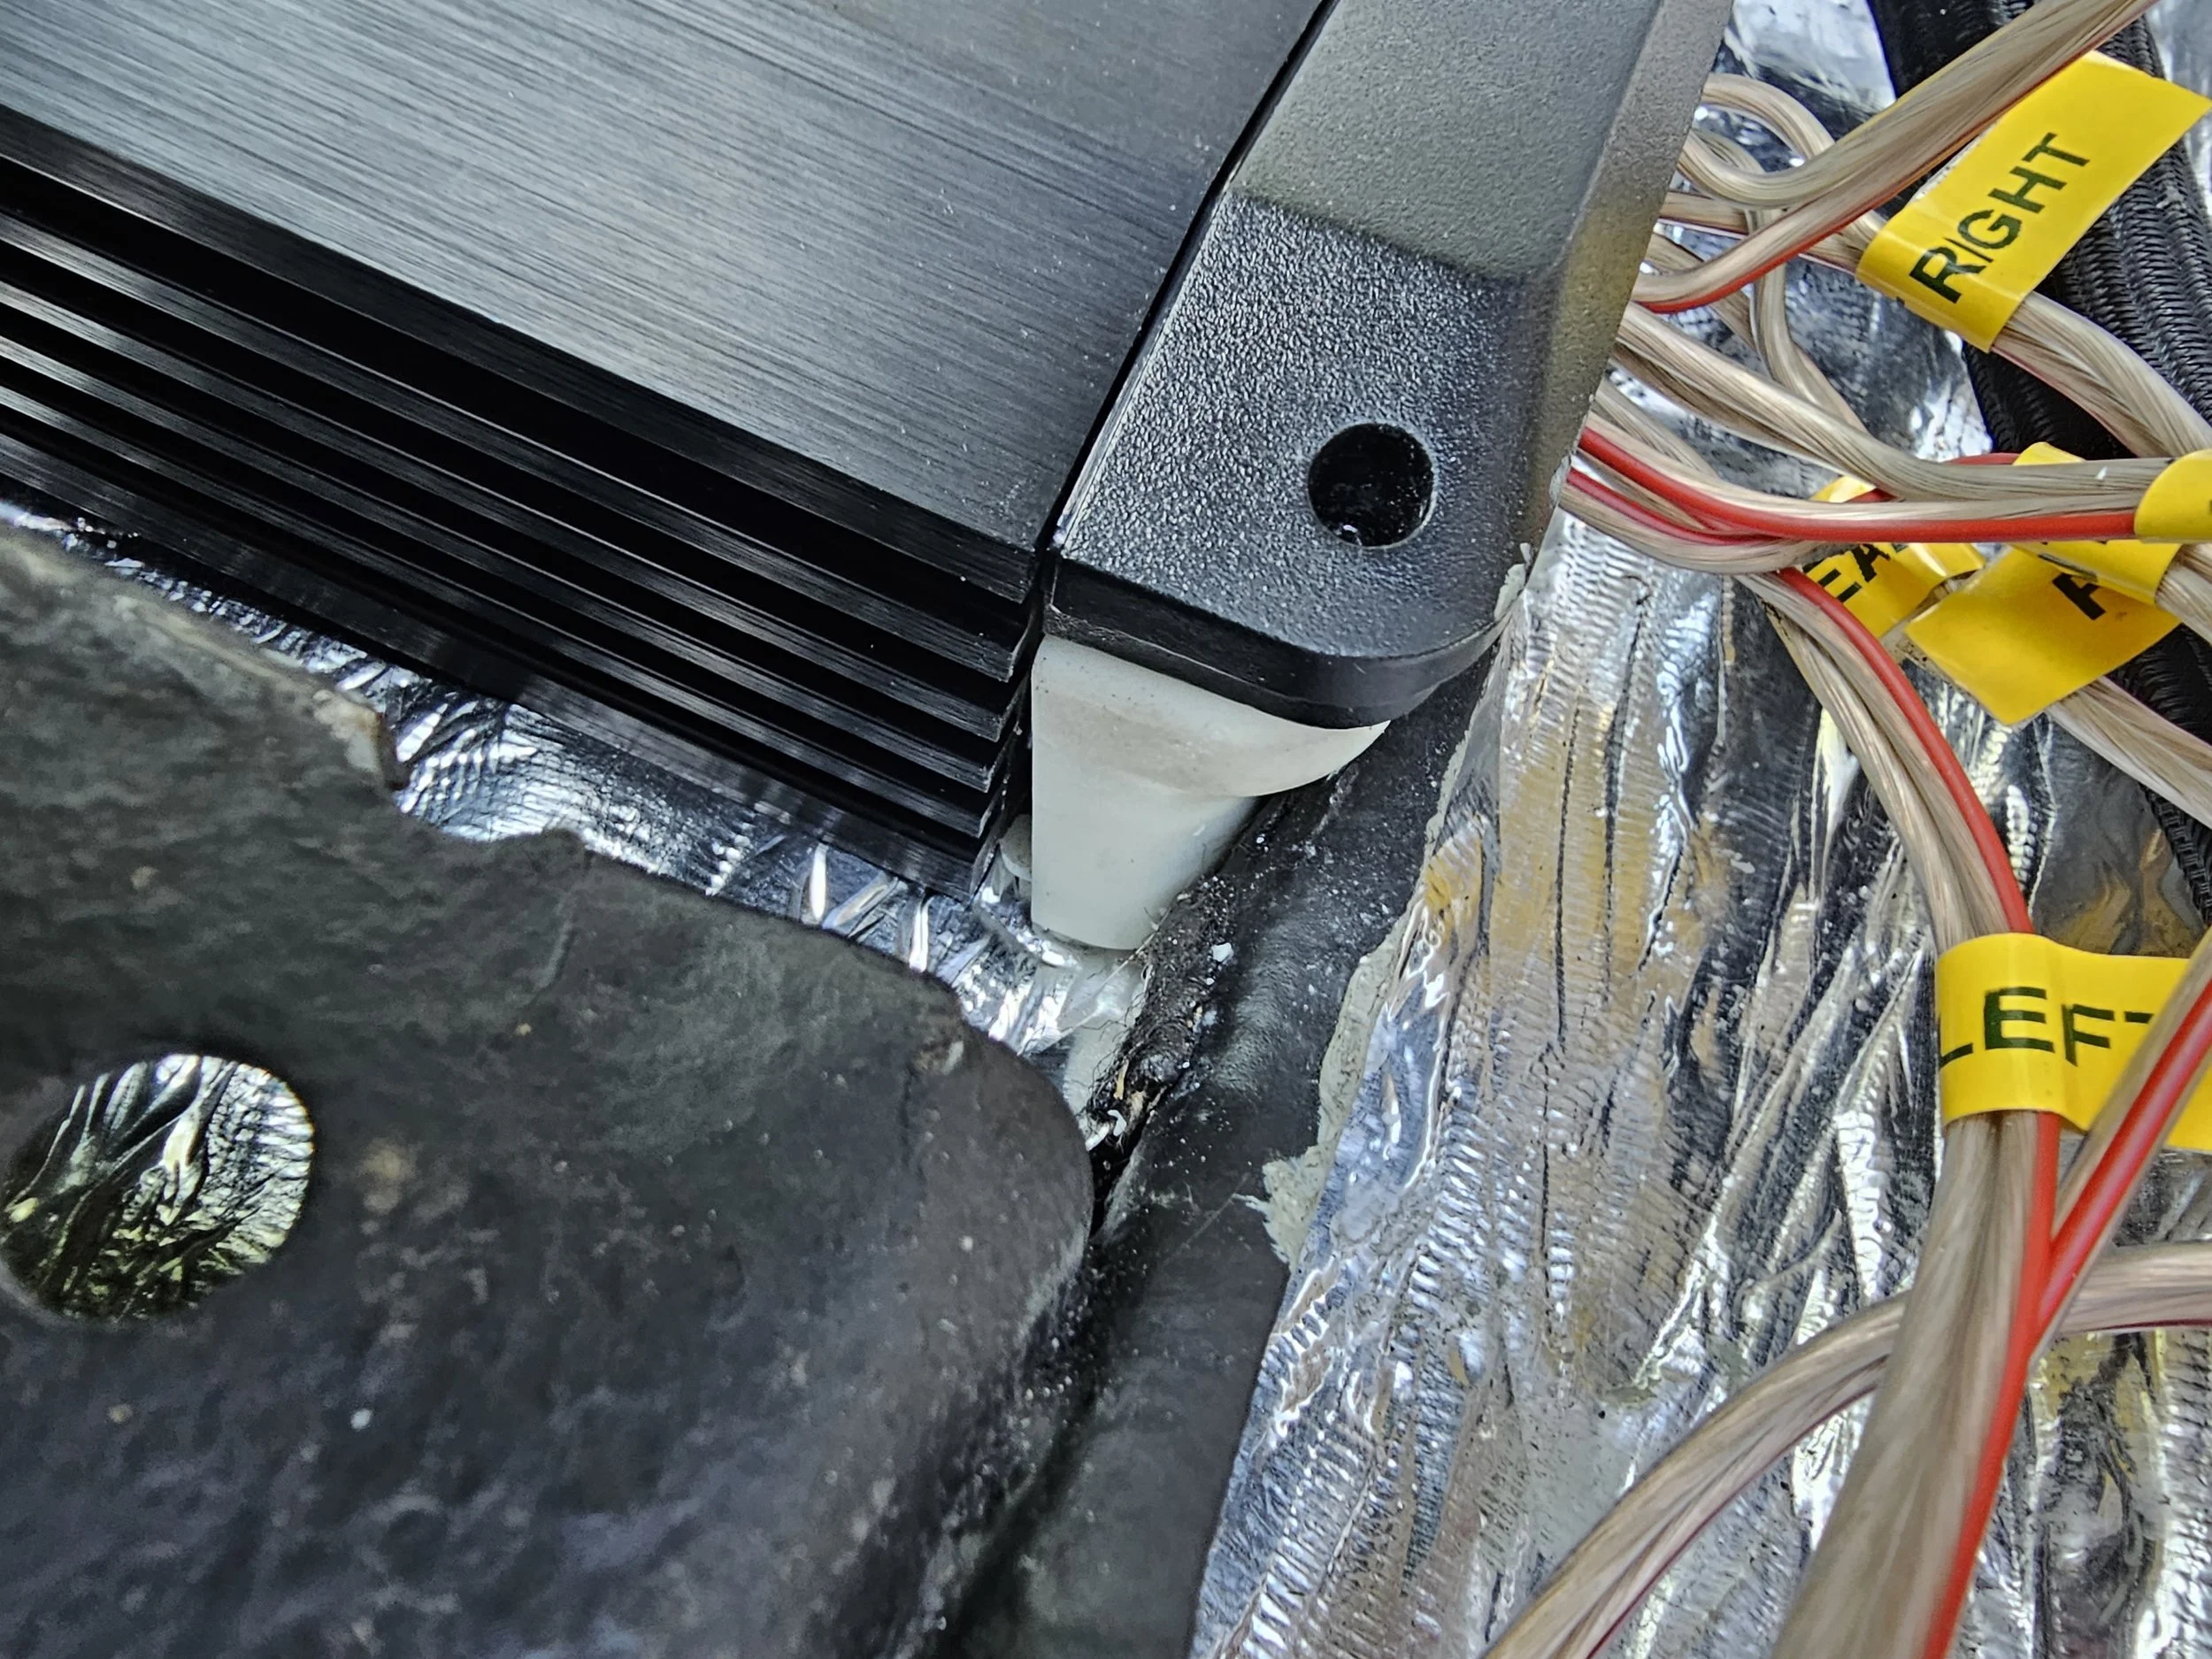
A tight fit, to be sure, but it cleared the brace and allowed me to get the cables into the amp perfectly with no fouling of the amp itself.
The amp now sits perfectly and safely under the passenger's seat.
Beep Beep
Fixing the horn.
When I got the car, I noticed the horn was temperamental. After taking apart the mechanism, I discovered another excuse to whip out my skills.
The horn's mounting plastic had snapped, meaning the little copper wing was just dangling, also explaining why, when I went over speed bumps, the horn would go off…
Again, an easy, quick job to rectify with 3D printing, but without it, I imagine getting an OEM+ solution would have been a very difficult job.

‘Downforce’
Carbon Fibre Datsun 240z Wing.
This project is currently ongoing.
I’m a big fan of the styling of Group B Rally cars — the extortionate wide-body styles and statement wings and spoilers. Seeing as the 240Z has rally heritage, I figured it would be a fun project to attempt to design my own rear spoiler for my car.
I have no experience with carbon fibre, but I do have 3D printers and enough time to find out what could go wrong if I bit off more than I could chew. So, I started designing my very own ‘large-scale’ car part.
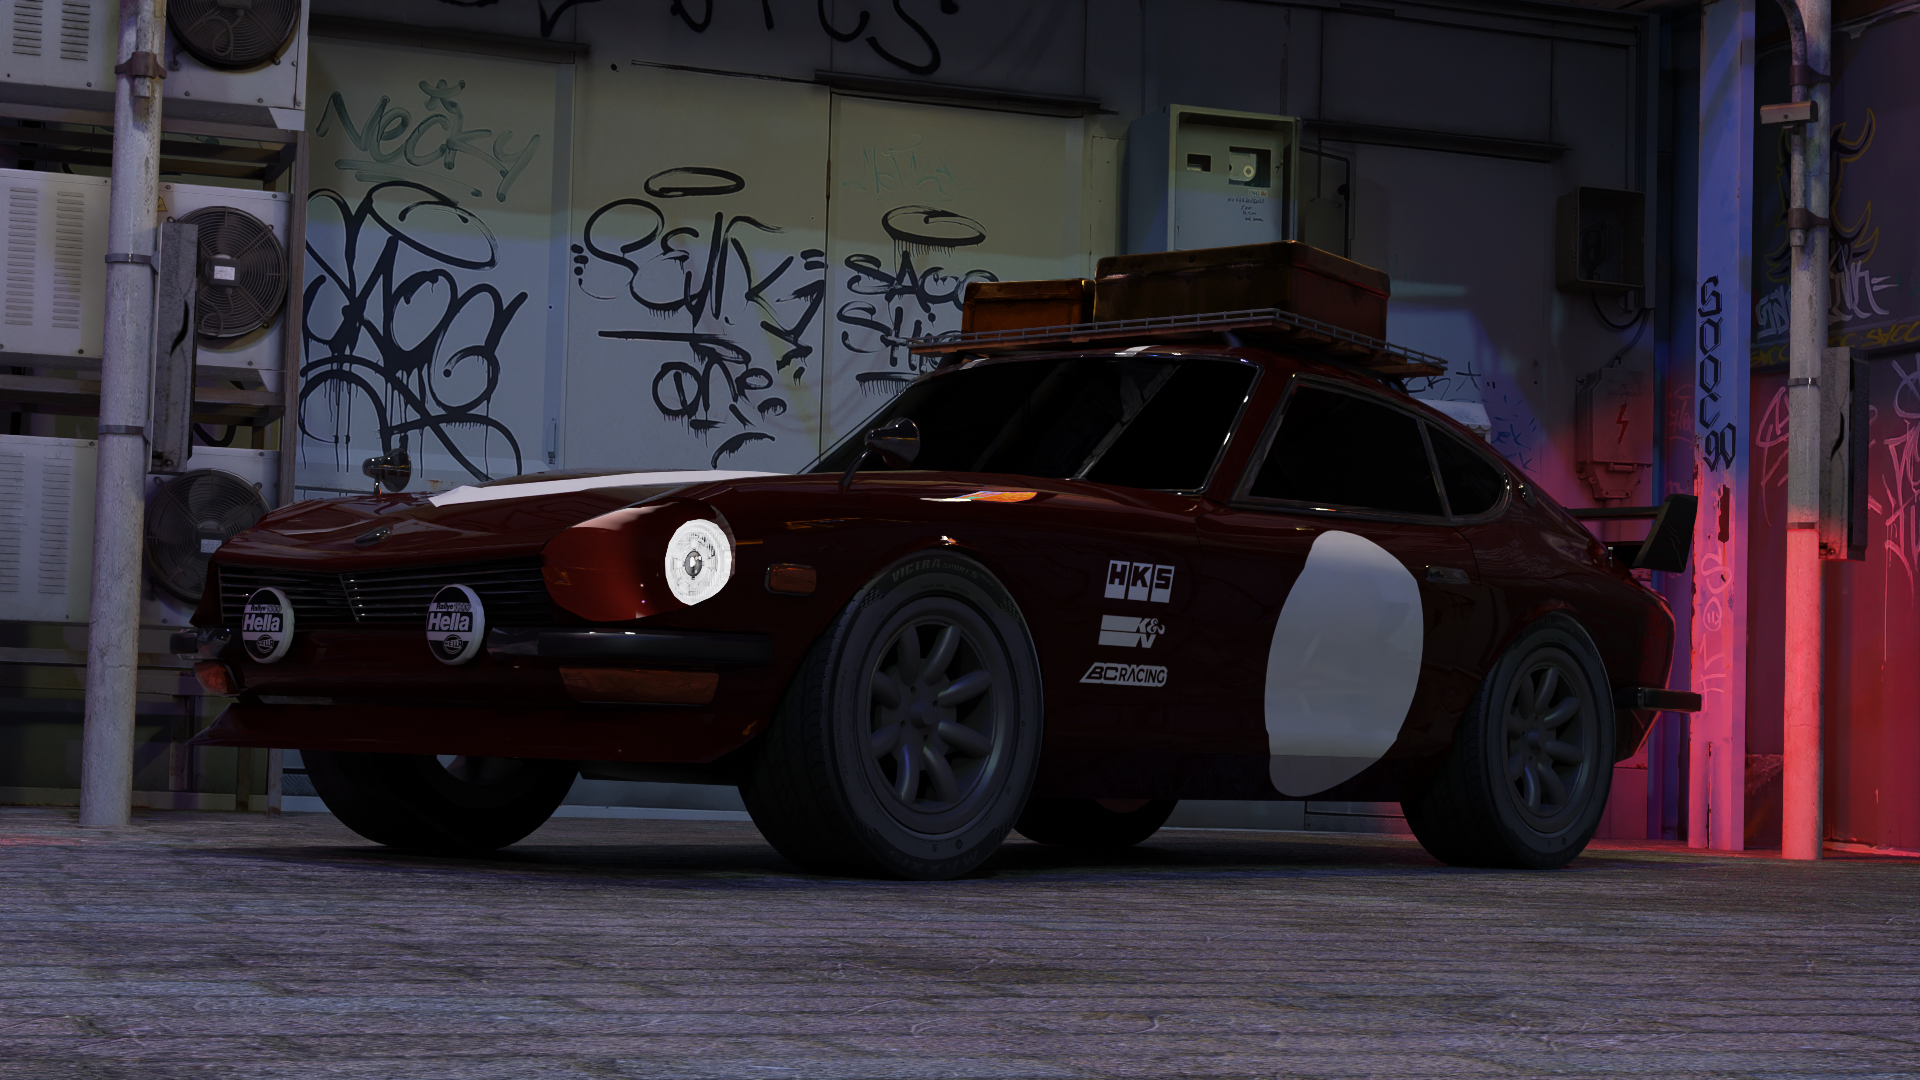
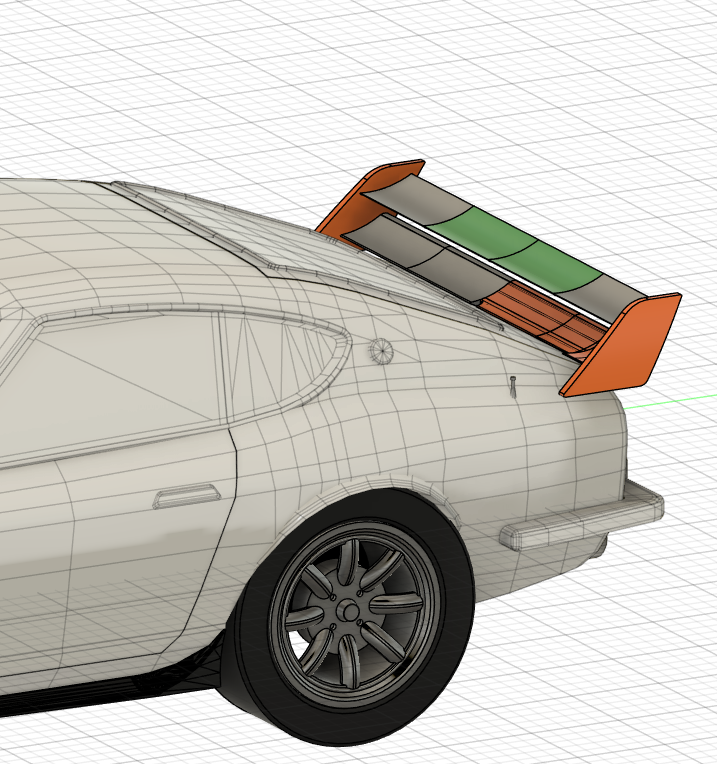
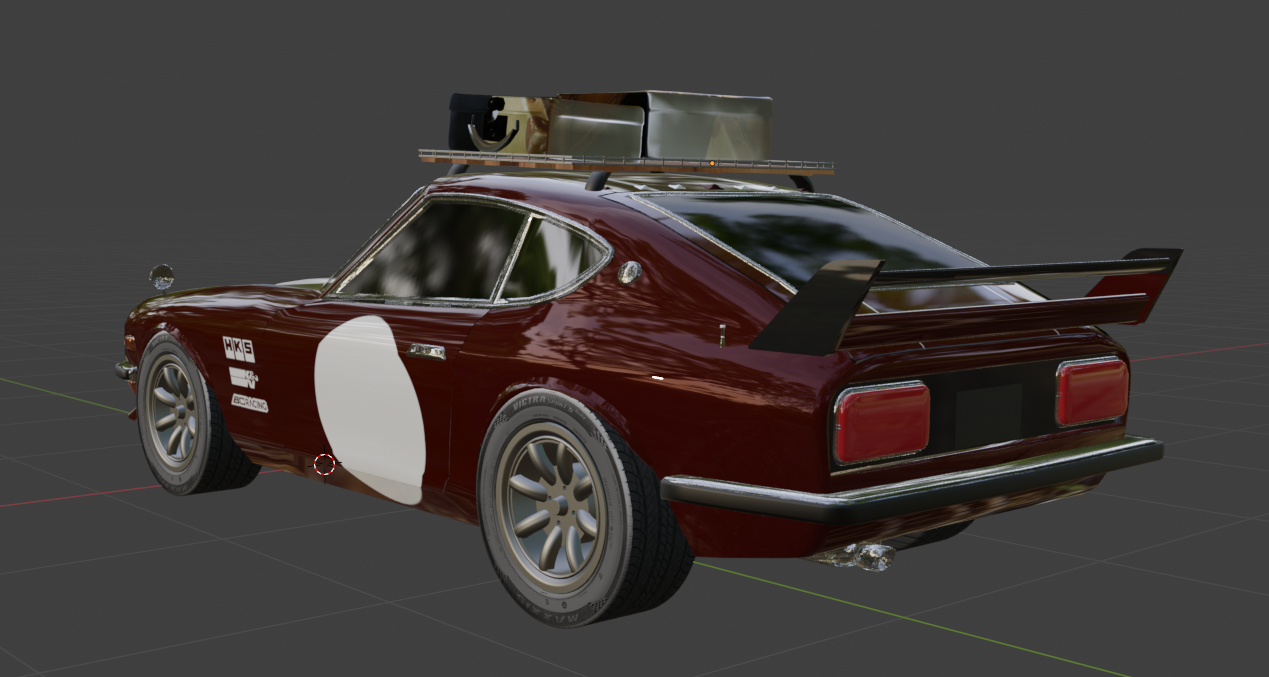
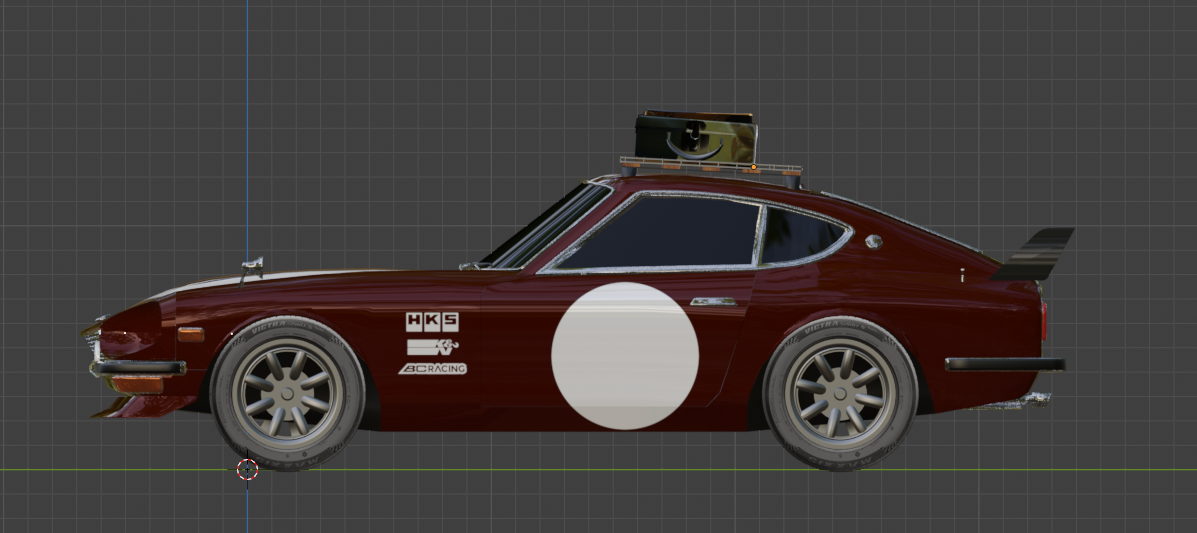
While designing the wing of the car, I got a little carried away and decided to 3D model the car I wanted in full so I could have a reference to work to during my restoration.
It won’t be everyone’s cup of tea, but it’s what I want — a road car with subtle hints toward rally heritage and the iconic Japanese ‘dot’ that was seen on a lot of the circuit racing cars of the era.
I want this car to be something that would look at home in a classics/retro rally, while still not looking like a yobbo’s modified sports car in an ASDA car park.
This is my happy medium, and while I may never get the car to look like this in real life (as a lot of money would be needed to get it to this stage), at least I’ve made my very own car poster.
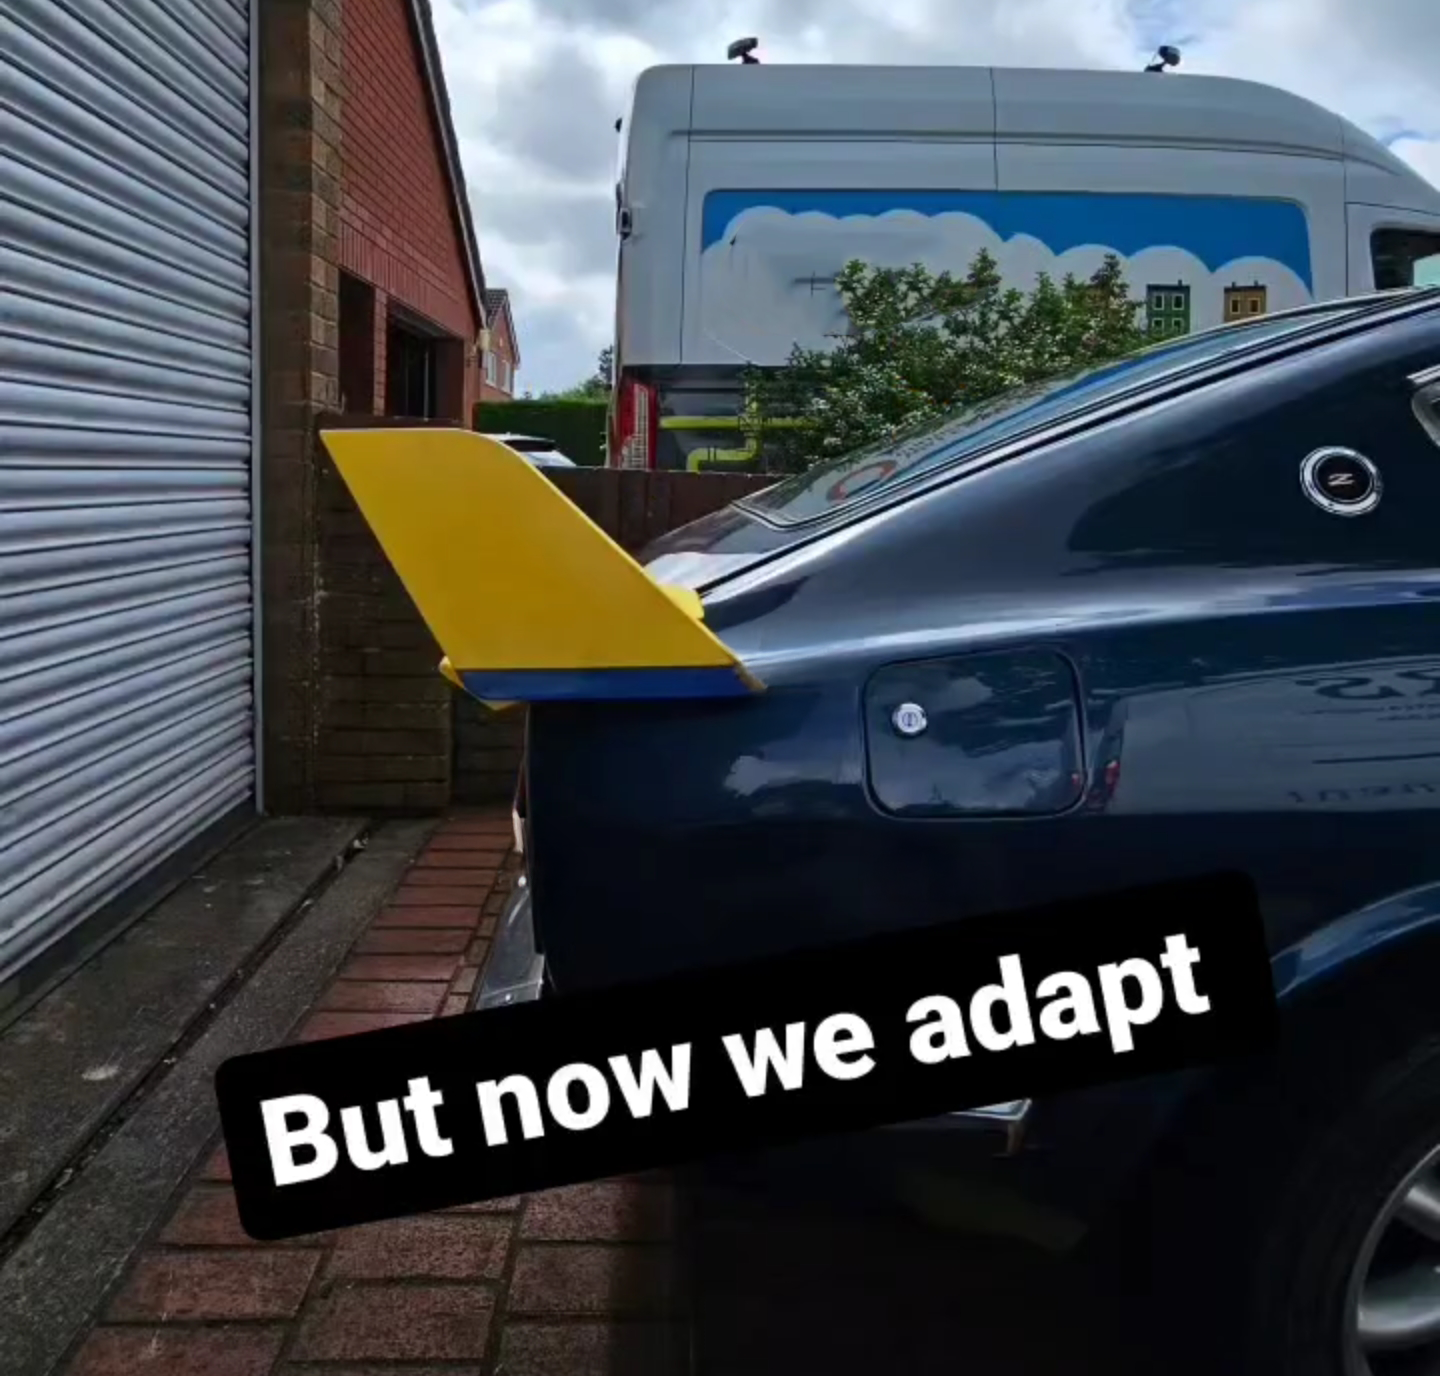
Printing the Prototypes.
This was generally an easy print: straight edges, just lots of pieces. I had designed the parts to all link up with wooden dowels to ensure the correct fitment and to add a little rigidity to the prototype.
Printed in basic, leftover PLA filament, this wouldn’t be suitable for road use, but seeing as it’s just for visual development, it was the obvious choice for this stage in the process.
Once the main bulk of the wing was printed, it was time to test fit it to the body lines of the car. Of course, this wasn’t going to be a perfect fit from the get-go, as the model I had gotten of the car during the design stage was not a direct scan of an existing car but more just a general mock-up with limited dimensional accuracy.
Had I had access to a 3D scanner at this time, these prototype stages would have taken significantly less time.


For the second prototype, I had decided to try and save some plastic and print essentially a wireframe of the shape held together with dowels. This approach wouldn’t be nearly as satisfying to see on the car, but it would still be sufficient enough for me to start to conform the shape to the arc of the rear hatch and boot release button.
